
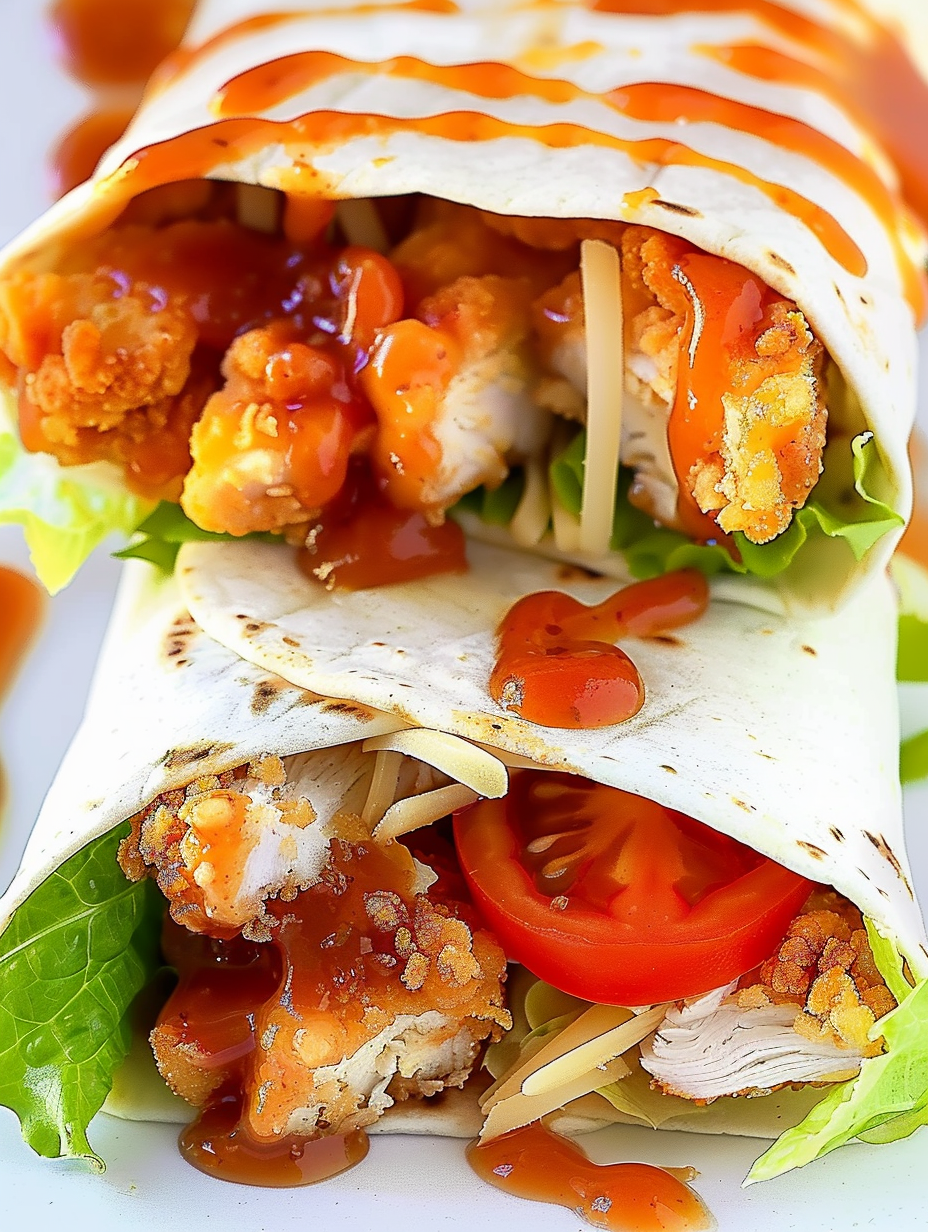
Sticky Chicken Finger Wraps

Sweet and spicy glazed chicken fingers tucked into warm flour tortillas with lettuce, tomato and cheddar. Fast, crowd-pleasing wraps perfect for lunch or weeknight dinner.
This recipe for sticky chicken finger wraps arrived in my life on a hectic weeknight when I needed something fast, satisfying, and utterly irresistible. I had a pack of breaded chicken fingers in the freezer, a craving for something sweet and spicy, and a small bowl of cheddar leftover from a party. The combination of Frank's Original Hot Sauce caramelized with brown sugar hit a nostalgic note. It is one of those dishes that looks humble but tastes like celebration. It quickly became a favorite for casual dinners, easy lunches, and last minute get-togethers.
What makes these wraps special is the contrast of textures and temperatures. Warm, crispy chicken fingers get a glossy, sticky glaze that clings to every bite. Fresh lettuce and sliced tomato provide a cool crunch while shredded cheddar adds a salty richness that balances the sweet heat from the glaze. I first tested this idea on a Sunday afternoon and served the wraps to friends; they disappeared within minutes and multiple people asked for the recipe. Since then I use this technique whenever I want a fuss-free, crowd-pleasing meal that feels indulgent without complicated prep.
Why You'll Love This Recipe
- Ready in about 20 minutes from start to finish using store-bought breaded fingers, so it is perfect for quick weeknight meals or easy party food.
- The sweet and spicy glaze is a simple three-ingredient sauce that transforms ordinary chicken into something glossy and flavorful with minimal effort.
- Uses pantry staples like hot sauce, brown sugar, and water, plus deli or frozen chicken fingers, making it easy to pull together at a moment's notice.
- Highly adaptable: make it milder by reducing hot sauce or swap tortillas for lettuce leaves for a lighter option.
- Makes great leftovers and is ideal for meal prep because the components store well separately and assemble quickly when hungry.
My family adores these wraps because they are both familiar and exciting. Kids love the glossy sweet coating and adults appreciate the bright kick from the hot sauce. Over time I learned to keep the sauce warm but not boiling after it reduces so the coating stays sticky without becoming hard. Every time I make these we laugh about how something so simple can taste so special, and the recipe has been requested for potlucks, game nights, and casual birthday dinners.
Ingredients
- Frank's Original Hot Sauce: Use 1/3 cup to create a bright, vinegary backbone. Frank's works well because it has a balanced heat and tang that caramelizes nicely. If you prefer a milder profile, substitute with a milder cayenne-based wing sauce.
- Packed light brown sugar: Three quarters of a cup gives the glaze its sticky texture and caramelized sweetness. Pack it into the measuring cup and level for consistent results. Dark brown sugar will deepen the molasses flavor if desired.
- Water: One quarter cup helps dissolve the sugar and bring the glaze to a smooth consistency without making it syrupy hard.
- Breaded chicken fingers: Eight warm chicken fingers, either from the deli or frozen and fully cooked according to package directions. Choose a brand with sturdy breading so the glaze clings instead of turning soggy.
- Burrito-size flour tortillas: Four large tortillas offer an ample base to wrap the fingers and fillings. Look for tortillas about 10 to 12 inches across for easy rolling.
- Shredded cheddar cheese: Two cups total, about 0.5 cup per wrap. Sharp cheddar adds tang and cutting through the sweetness of the glaze.
- Tomato: One small tomato, thinly sliced to add acidity and freshness. Roma or vine-ripened tomatoes both work well.
- Lettuce: Two cups chopped romaine or iceberg for crunch. Wash and spin dry to keep the wraps from becoming soggy.
Instructions
Make the glaze: Pour 1/3 cup Frank's Original Hot Sauce, 3/4 cup packed light brown sugar, and 1/4 cup water into a medium saucepan. Heat over medium and stir until the sugar dissolves. Bring the mixture to a gentle boil, watching carefully, and allow it to bubble for 2 to 4 minutes until the liquid reduces and becomes glossy. The sauce will thicken as it cools, so remove it from the heat once it coats the back of a spoon and let it stand for a few minutes while you prepare the chicken. Cook or warm the chicken fingers: If you are using frozen chicken fingers, bake them according to the package instructions until hot and crisp, typically 20 to 25 minutes at 425 degrees Fahrenheit with a flip halfway through. If using deli-warmed fingers, simply reheat them in a 375 degree Fahrenheit oven for 6 to 8 minutes or in a skillet for 3 to 4 minutes per side to re-crisp the breading. Coat the chicken: Place the cooked chicken fingers in a shallow wide bowl or rimmed baking sheet. Pour the warm sticky glaze evenly over the chicken, then gently toss with tongs to coat each finger. Work quickly while the glaze is warm so it adheres but does not cool into a hard shell. Taste one to ensure the balance of sweet and heat is to your liking and adjust with a splash more hot sauce if needed. Assemble the wraps: Lay out a burrito-size tortilla and place two sauced chicken fingers across the center. Sprinkle about 1/2 cup shredded cheddar over the chicken, add a handful of chopped lettuce and 2 to 3 slices of tomato. Fold the bottom edge up and roll tightly to form a wrap. Repeat for the remaining tortillas. For an extra warm wrap, place assembled wraps seam-side down in a skillet for 1 minute per side to seal and melt the cheese slightly. Serve immediately: Cut wraps in half diagonally if desired and serve while the chicken is warm and the glaze is glossy. Provide extra sticky sauce on the side for dipping. These are best eaten the moment they are assembled to preserve the contrast between crispy chicken and fresh vegetables.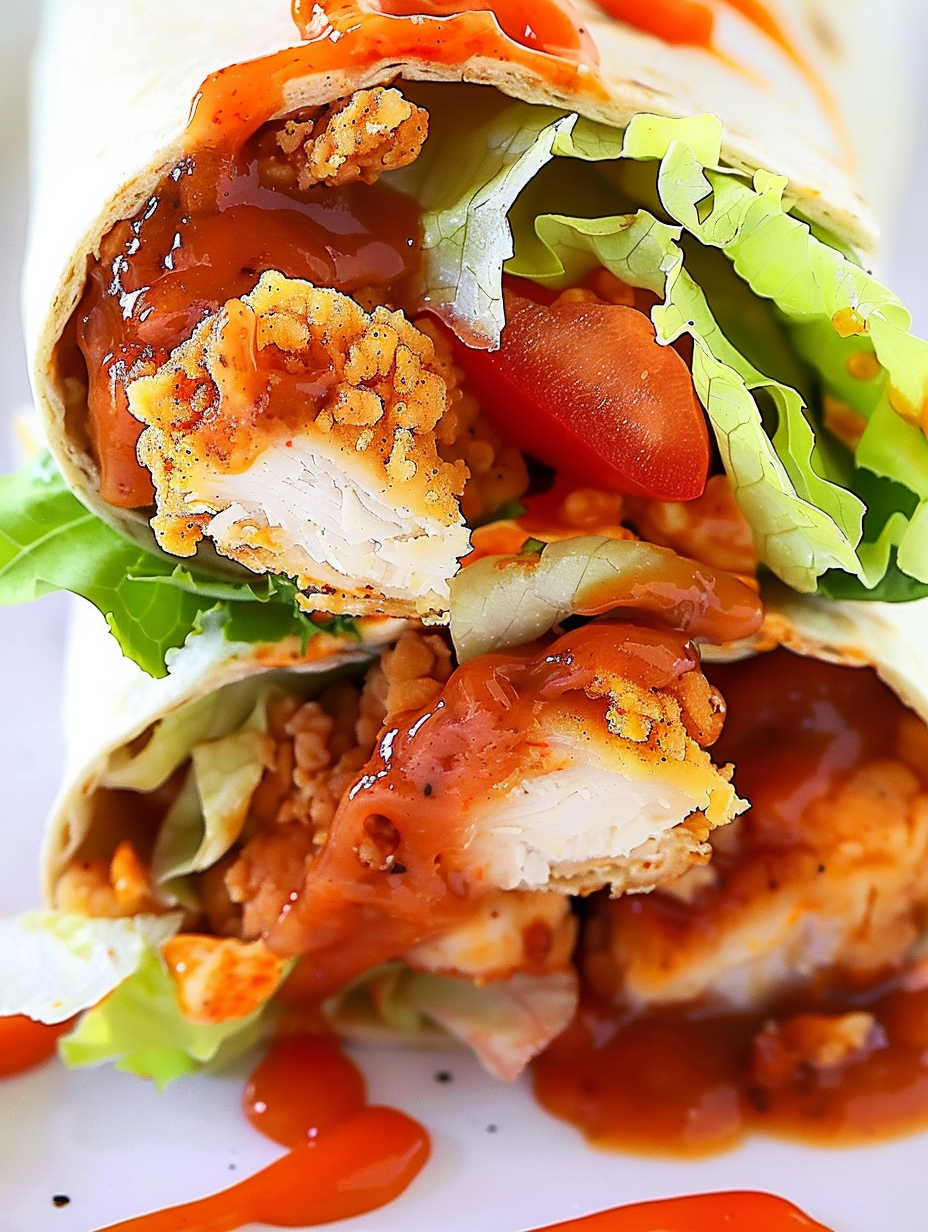
You Must Know
- This preparation is high in protein and satisfying, but contains gluten and dairy, so it is not suitable for those with those specific allergies without substitutions.
- Store components separately in the refrigerator for up to 3 days. Keep the glaze in an airtight container and reheat gently to re-liquefy before tossing with chicken.
- Freezing assembled wraps is not recommended because the tortilla will become soggy. The chicken and sauce freeze well for up to 3 months if stored airtight and thawed in the refrigerator overnight.
- If you want a lower calorie option, swap tortillas for large lettuce leaves and use reduced-fat cheese to cut calories and carbs.
One of my favorite parts about this dish is how it adapts to different appetites. At a recent family gathering I doubled the batch and kept extra sauce warm in a slow cooker to recoat fresh batches as they came out of the oven. Everyone loved being able to customize heat and fillings, and the sticky glaze was the most-requested leftover to drizzle over roasted vegetables the next day.
Storage Tips
To maintain the best texture, store the glaze and the cooked chicken fingers separately from the tortillas and fresh produce. Place cooled glazed chicken in an airtight container and refrigerate for up to 3 days. Keep tortillas wrapped in foil or a sealed plastic bag at room temperature for up to 2 days or refrigerate for up to a week. When reheating glazed chicken, warm gently in a 350 degree Fahrenheit oven for 6 to 8 minutes so the breading re-crisps and the glaze loosens. Avoid reheating in a microwave as that will make the breading soggy.
Ingredient Substitutions
If you need to adjust for dietary restrictions or pantry swaps, several substitutions work well. Replace the flour tortillas with large butter lettuce leaves for a low-carb option. Use coconut sugar or a 1 to 1 mix of maple syrup and a little cornstarch in place of brown sugar for a different flavor profile. For dairy-free versions, omit the cheddar or use a plant-based shredded cheese. If you want to reduce sodium, choose low-sodium chicken fingers and an unsalted hot sauce or dilute the sauce with a little extra water and a squeeze of fresh lime.
Serving Suggestions
These wraps pair beautifully with crisp sides like carrot sticks, cucumber ribbons, or a light slaw to echo the crunchy texture inside. For heartier meals, serve alongside sweet potato fries or a simple corn and black bean salad. Garnish wraps with chopped cilantro, a squeeze of lime, or pickled red onions for a bright burst of flavor. For parties, cut wraps into halves and secure with a toothpick to make handheld sliders that guests can grab from a platter.
Cultural Background
While this dish does not have a single traditional origin, it is an example of American comfort food influenced by Southern wing sauces and Tex-Mex assembly styles. The concept of coating fried proteins in a sweet and spicy glaze is rooted in classic barbecue and wing techniques, while tucking those proteins into tortillas draws from burrito and wrap traditions. The result is a hybrid that is both familiar and playful, reflecting contemporary home cooking that blends influences for fast, tasty results.
Seasonal Adaptations
In summer, brighten the wraps with ripe heirloom tomato slices and fresh basil. In cooler months, swap the tomato for roasted red peppers and add a handful of arugula for peppery bite. Holiday gatherings call for swapping cheddar for smoked gouda and adding a drizzle of maple syrup to the glaze for a cozy, autumnal note. For spring, include thinly sliced radishes and a splash of apple cider vinegar in the sauce for brightness.
Meal Prep Tips
For make-ahead convenience, cook the chicken fingers and store them unglazed in an airtight container. Prepare the glaze and cool before refrigerating in a sealed jar. When ready to serve, reheat the chicken and toss with warmed glaze, then assemble wraps quickly. Portion the shredded cheese, lettuce, and tomato into small containers for grabbing and building as needed. This approach allows you to prepare components up to 72 hours ahead while ensuring the assembled wraps stay fresh and crisp.
These sticky chicken finger wraps are simple, satisfying, and adaptable. Whether you need a quick family dinner or an easy party platter, they deliver bold flavors with minimal effort. Make them your own by adjusting the heat, trying different cheeses, or serving with creative sides. Enjoy the sticky, crunchy, and fresh contrasts in every bite.
Pro Tips
Warm the glaze but do not overboil it; remove from heat when it coats the back of a spoon so it stays glossy rather than hardening.
Re-crisp chicken in a hot oven at 375 degrees Fahrenheit for 6 to 8 minutes before tossing with warm sauce to keep the breading firm.
Assemble wraps just before serving to maintain the contrast between crispy chicken and fresh lettuce.
For extra flavor, add a squeeze of fresh lime to the sauce after removing from heat to brighten the sweetness.
This nourishing sticky chicken finger wraps recipe is sure to be a staple in your kitchen. Enjoy every moist, high protein slice — it is perfect for breakfast or as a wholesome snack any time.
FAQs about Recipes
Can I use frozen breaded chicken fingers?
Yes. If using frozen chicken fingers, cook according to package directions until fully cooked and crisp before coating with the sauce.
How long does the sticky sauce keep?
Store the glaze in an airtight container in the refrigerator for up to 7 days and reheat gently to loosen before tossing with chicken.
Tags
Sticky Chicken Finger Wraps
This Sticky Chicken Finger Wraps recipe makes perfectly juicy, tender, and flavorful steak every time! Serve with potatoes and a side salad for an unforgettable dinner in under 30 minutes.
Ingredients
Sticky Sauce
Chicken Wraps
Instructions
Make the glaze
Combine 1/3 cup hot sauce, 3/4 cup packed light brown sugar, and 1/4 cup water in a medium saucepan. Heat over medium, stir until sugar dissolves, bring to a gentle boil and cook 2 to 4 minutes until glossy. Remove from heat and let stand a few minutes to thicken.
Cook or warm chicken fingers
If using frozen chicken fingers, bake according to package directions until hot and crisp. For deli-warmed fingers, reheat in a 375°F oven for 6 to 8 minutes or in a skillet to re-crisp breading.
Coat the chicken
Place cooked chicken fingers in a large bowl, pour warm glaze over them, and gently toss with tongs to coat each piece while the glaze is still warm and tacky.
Assemble the wraps
Place two glazed chicken fingers on a large tortilla, add about 1/2 cup shredded cheddar, chopped lettuce, and sliced tomato, then fold and roll tightly. For a melted cheese finish, sear in a skillet seam-side down for 1 minute per side.
Serve
Cut in half if desired and serve immediately with extra sticky sauce on the side for dipping or drizzling.
Last Step: Please leave a rating and comment letting us know how you liked this recipe! This helps our business to thrive and continue providing free, high-quality recipes for you.
Nutrition
Did You Make This?
Leave a comment & rating below or tag
@velvetyum on social media!
Categories:
You might also like...

Cheesy Zucchini Rollatini
Tender grilled zucchini rolled with a basil-kissed ricotta filling, nestled in marinara, and baked until the mozzarella bubbles and turns golden.

Crispy Zucchini and Squash
Golden, garlicky rounds with a deep-fried crunch made lighter in the air fryer. A fast, vitamin-packed side everyone devours.

Chicken Parmesan Meatballs
Tender chicken meatballs simmered in marinara, finished with melted mozzarella and basil for cozy, weeknight Italian comfort in every bite.
Did You Make This?
Leave a comment & rating below or tag @velvetyum on social media!
Rate This Recipe
Share This Recipe
Enjoyed this recipe? Share it with friends and family, and don't forget to leave a review!
Comments (1)
This recipe looks amazing! Can't wait to try it.
Comments are stored locally in your browser. Server comments are displayed alongside your local comments.

Hi, I'm Emma!
What's Popular

30-Minute Meals!
Join to receive our email series which contains a round-up of some of our quick and easy family favorite recipes.