
Jelly Thumbprint Cookies (Peanut-Studded Holiday Favorites)

These peanut-studded jelly thumbprint cookies are a holiday classic — buttery, tender rounds rolled in chopped peanuts with a small jewel of red or green jelly in the center.
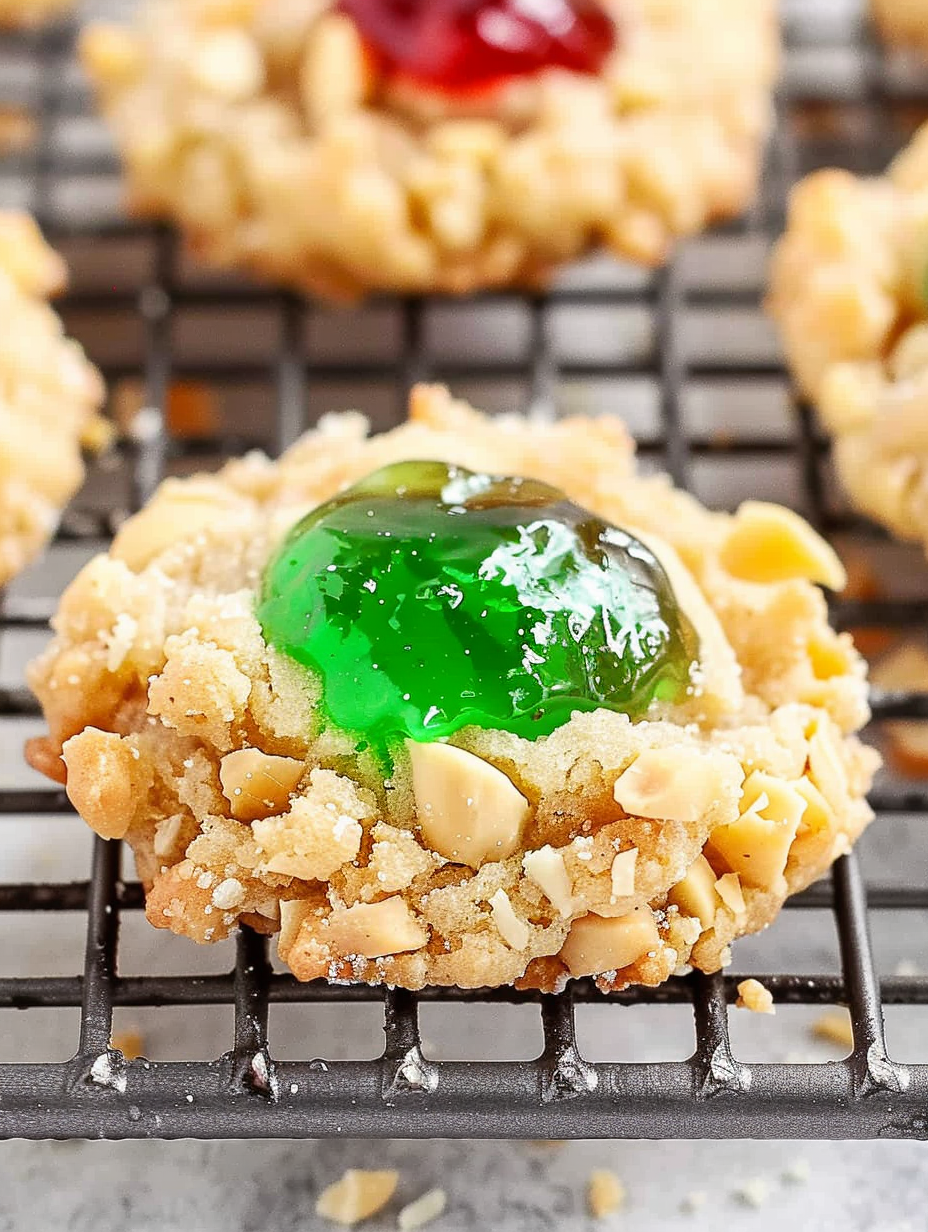
This batch of jelly thumbprint cookies has been a holiday constant in my kitchen for as long as I can remember. I first adapted these while chasing a crunchy, nut-forward version of the classic thumbprint many years ago; adding chopped peanuts gave the cookies a pleasant savory contrast that cradled the sweet jelly perfectly. They are buttery but light, with a slightly tender crumb from the egg yolk and a satisfying crunch from the nuts. Every year the kids ask to help press the centers and choose which color jam goes into each little well, and the resulting tray never lasts long at family gatherings.
I discovered this particular ratio during a December baking marathon when I only had pantry staples and wanted something both festive and simple. The almond extract gives a subtle warmth that pairs beautifully with the toasted peanuts, while a teaspoon of jelly provides a concentrated burst of fruity sweetness without running over the edges. These cookies shine because their textures and flavors are clear and honest: crisped peanut edges, a melt-in-your-mouth base, and a glossy jewel of jam. They bring back memories of cookie exchanges, snow-day baking, and my father stealing the first warm one off the cooling rack.
Why You'll Love This Recipe
- Quick to make: the active prep takes about 10 minutes and they bake in 12–14 minutes, so you can have a batch on the table in under 30 minutes from start to finish.
- Pantry friendly: uses common staples—butter, flour, sugar, an egg—and small amounts of jam so a little jar goes a long way; perfect for last-minute baking.
- Family friendly: kids love making the thumbprints and spooning in jam; the chopped peanuts add a fun texture that adults appreciate too.
- Make-ahead options: the dough balls can be shaped ahead of time and refrigerated for a day, or baked cookies keep well at room temperature for several days.
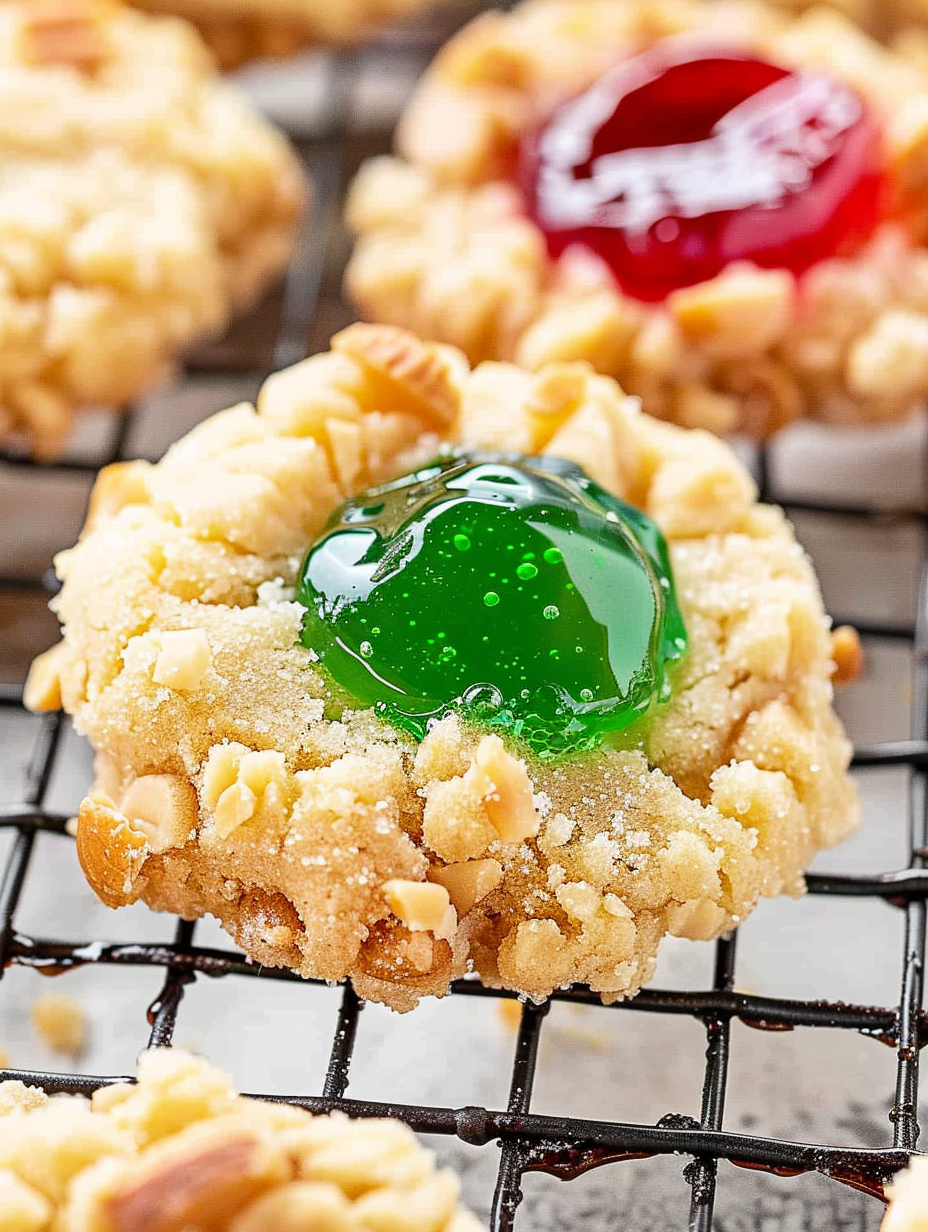
- Visually festive: alternating red and green jam gives a classic holiday look, making these ideal for cookie trays and gift tins.
- Customizable: swap the peanuts for almonds or coconut, or use different jams for varied flavor profiles.
In my test batches the highest compliment came from my neighbor, who never eats sweets at home but confessed she couldn’t stop at one. The combination of salty peanut crunch and a bright hit of jam was the surprise that sold everyone. Over the years I’ve learned small details—press gently to avoid cracking, use a teaspoon of jam per well, and choose a firm jelly rather than runny preserves—to keep the centers neat during baking.
Ingredients
- Unsalted butter (1/2 cup, softened): Using real butter is essential for flavor and mouthfeel; let it soften at room temperature but not melt so it creams smoothly with the sugar. European-style butter gives a slightly richer taste.
- Light brown sugar (1/4 cup, packed): Adds moisture and a hint of caramel; pack it fairly snug for accurate sweetness. If you only have granulated sugar, expect a slightly less tender crumb.
- Large egg (1, divided): Separate the yolk and white—use the yolk in the dough to tenderize and the white to help the nuts adhere and create a glossy finish.
- Almond extract (1/2 teaspoon): A small amount enhances the nutty flavor; don’t overdo it or it will dominate the cookie.
- All-purpose flour (1 cup): Provides structure; spoon and level for best accuracy. Use a good-brand unbleached flour for consistent results.
- Kosher salt (1/4 teaspoon): Balances the sweetness and amplifies the peanut flavor—use table salt at half the listed amount if you must substitute.
- Chopped peanuts (1 cup): Dry-roasted peanuts add crunch and aroma; roughly chop to about pea-sized pieces so they stick easily and toast in the oven.
- Jelly (3 tablespoons red + 3 tablespoons green): Choose firm jellies or jellied preserves that won’t run; one teaspoon per cookie is just enough to make a bright center without leaking.
Instructions
Prepare the dough: In a large mixing bowl, cream 1/2 cup softened unsalted butter with 1/4 cup packed light brown sugar until light and fluffy, about 2 minutes with a hand mixer. Add the egg yolk from the separated egg and 1/2 teaspoon almond extract and beat until fully incorporated. Stir in 1 cup all-purpose flour and 1/4 teaspoon kosher salt until a soft dough forms. If the dough feels too sticky, chill 10 minutes; it should be pliable but not wet. Portion and shape: Use a tablespoon or a small cookie scoop to portion dough into roughly 1-inch balls (about 24). Rolling each between your palms gives uniform rounds. Place balls on a parchment-lined baking sheet spaced 1½ inches apart. For perfectly even cookies you can weigh portions—each should be about 16–18 grams. Coat in egg white and nuts: In a small bowl whisk the reserved egg white until frothy. In another shallow bowl spread the chopped peanuts. Dip each dough ball into the egg white, then roll in the chopped peanuts, pressing so the nuts adhere. The egg white creates a tacky surface so the nuts stick and brown nicely in the oven. Make the thumbprints and fill: With your thumb (or the back of a teaspoon), press a gentle, shallow well in the center of each nut-coated ball. Avoid pressing all the way through. Use about 1 teaspoon of firm jelly per indent—too much jelly will overflow and may scorch on the pan. Alternate red and green for a festive look. Bake and cool: Preheat the oven to 350°F (175°C). Bake the cookies for 12–14 minutes, until the peanuts begin to brown and the bases are just set. Remove from oven and transfer to a wire rack to cool completely; the jam will set as they cool. Cool fully before storing to avoid sticky, melted centers.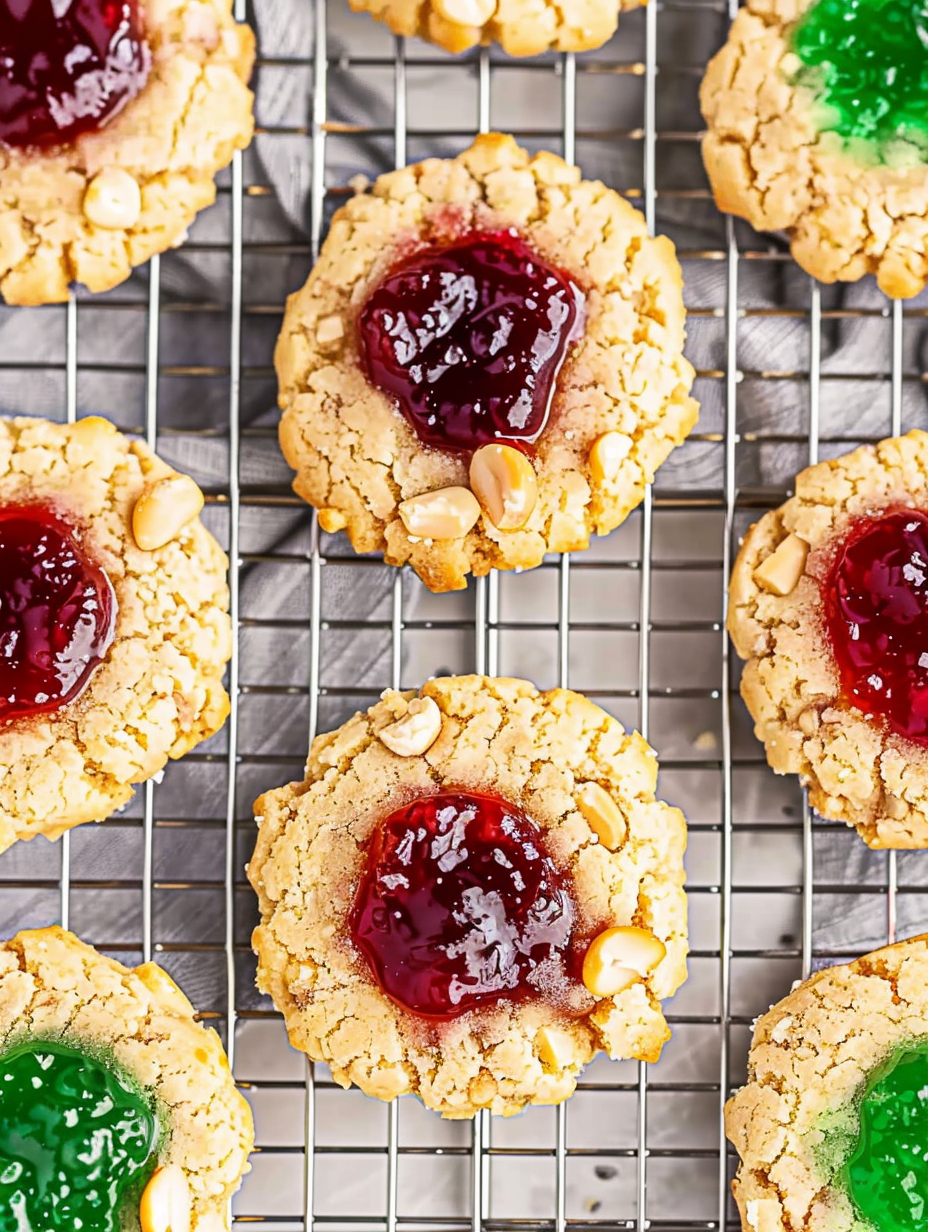
You Must Know
- One teaspoon of jam per cookie is sufficient—any more and it will overflow and burn; firm jellies work best.
- Cookies keep at room temperature in an airtight container for up to 5 days; they can be frozen (unfilled or filled) for up to 3 months.
- Use a shallow well when pressing so the structure of the cookie remains intact; deep wells may collapse during baking.
- To make ahead, shape the balls and coat them completely, then refrigerate up to 24 hours before finishing the thumbprints and baking.
- These are relatively high in protein and fat thanks to the peanuts, but portion control (one or two cookies) keeps them a reasonable treat.
My favorite thing about these cookies is how quickly they transport me to holiday mornings: the smell of roasting nuts, a little jam on my fingertip, and kids debating red versus green. The spare sweetness means each bite leaves you wanting another, and yet they’re simple enough to make while juggling other baking tasks. I’ve learned to keep the jam jars modestly portioned so kids don’t overfill and to line trays with parchment for easy cleanup—both small habits that keep holiday baking joyful instead of chaotic.
Storage Tips
Store completely cooled cookies in a single layer or separated with parchment in an airtight container at room temperature for up to five days; avoid stacking while still warm to prevent jam transfer. For longer storage, freeze baked cookies on a tray until firm, then transfer to a freezer-safe container for up to three months. If freezing before baking, shape and coat balls, cover tightly, and thaw overnight in the refrigerator before pressing thumbprints and filling with jam. Reheat briefly in a low oven (275°F/135°C for 5–7 minutes) to refresh crispness if desired.
Ingredient Substitutions
If peanuts are an issue, swap them for chopped almonds, pecans, or toasted coconut for a different texture and flavor; almonds give a cleaner flavor, while pecans add buttery notes. To make these dairy-free, use a plant-based butter stick with a 1:1 ratio; expect a slightly different texture. For nut-free households, finely crushed graham crackers or toasted oats can mimic the crunch. Use preserves instead of jelly for a chunkier center, but use slightly less to avoid overflow (about 3/4 teaspoon per cookie).
Serving Suggestions
Serve these on a holiday cookie platter alongside spritz cookies and peppermint bark for a textural contrast. They pair nicely with strong coffee, black tea, or a mug of hot cocoa for dunking. For a party, place them on tiered trays alternating jam colors for visual impact. Garnish with a tiny mint leaf next to green-jelly cookies or a sprinkle of finely grated orange zest on red-jelly cookies for a subtle lift and a professional look.
Cultural Background
Thumbprint-style confections trace back to European baking traditions, with variations appearing across Scandinavian and Central European holiday tables under different names. The concept—small buttery rounds with a fruit center—has long been adapted regionally. In the United States, they became a staple cookie-exchange item, often made festive with red and green fillings at Christmas. The peanut twist in this version is an American innovation that leverages the country’s love of roasted nuts and peanut-forward confections.
Seasonal Adaptations
For summer, swap jellies for bright citrus curds or apricot preserves and use chopped pistachios for a lighter profile. In autumn, spread a smear of spiced apple butter and roll edges in toasted pecans; a pinch of ground cinnamon in the dough enhances seasonal warmth. For Valentine’s Day, use raspberry jam and press a small heart-shaped indentation lightly for a romantic presentation. Little changes in jam and nuts shift the mood of the cookies instantly.
Meal Prep Tips
For efficient holiday baking, make multiple sheets at once and work assembly-line style: portion dough, chill if needed, whisk egg white, spread nuts, roll and coat, then press and fill just before baking. Use parchment-lined trays so you can bake, cool, and swap trays quickly. If shipping cookies, wrap layers in parchment and use bubble-lined tins; add a desiccant pack if shipping long distances to prevent sogginess.
These thumbprint cookies are a small pleasure that multiply quickly when shared. Whether you keep them all to yourself or send boxes to neighbors, they bring together simple ingredients into something memorably festive. I hope this version becomes part of your holiday rotation and brings home as many warm memories as it has mine.
Pro Tips
Use a tablespoon or small cookie scoop for even 1-inch dough balls and consistent baking.
Press gently with your thumb or the back of a teaspoon to avoid cracking the cookie edge.
Choose firm jellies rather than runny preserves to prevent overflow during baking.
Let cookies cool completely so the jam sets and does not become sticky during storage.
This nourishing jelly thumbprint cookies (peanut-studded holiday favorites) recipe is sure to be a staple in your kitchen. Enjoy every moist, high protein slice — it is perfect for breakfast or as a wholesome snack any time.
FAQs about Recipes
How much jelly should I put in each thumbprint?
Use about 1 teaspoon of firm jelly per cookie. Too much will overflow and may burn.
Can I freeze the dough balls?
Yes. Shape, coat, and freeze on a tray until solid; transfer to a bag and freeze up to 3 months. Thaw in refrigerator before baking.
Tags
Jelly Thumbprint Cookies (Peanut-Studded Holiday Favorites)
This Jelly Thumbprint Cookies (Peanut-Studded Holiday Favorites) recipe makes perfectly juicy, tender, and flavorful steak every time! Serve with potatoes and a side salad for an unforgettable dinner in under 30 minutes.
Instructions
Make the dough
Cream 1/2 cup softened unsalted butter with 1/4 cup packed light brown sugar until light. Add the egg yolk and 1/2 teaspoon almond extract, then mix in 1 cup all-purpose flour and 1/4 teaspoon kosher salt until a soft dough forms.
Portion and shape
Portion the dough into 1-inch balls using a tablespoon or cookie scoop (about 24). Roll between your palms for even rounds and place on a parchment-lined baking sheet.
Coat with egg white and peanuts
Whisk the reserved egg white until frothy. Dip each ball in the egg white, then roll in 1 cup chopped peanuts, pressing gently so the nuts adhere.
Make thumbprints and fill
Press a shallow well in the center of each nut-coated ball with your thumb. Spoon about 1 teaspoon of jelly into each well, alternating red and green for a festive look.
Bake and cool
Bake at 350°F (175°C) for 12–14 minutes until peanuts begin to brown. Transfer to a wire rack to cool completely so the jam sets.
Last Step: Please leave a rating and comment letting us know how you liked this recipe! This helps our business to thrive and continue providing free, high-quality recipes for you.
Nutrition
Did You Make This?
Leave a comment & rating below or tag
@velvetyum on social media!
Categories:
You might also like...

Cheesy Zucchini Rollatini
Tender grilled zucchini rolled with a basil-kissed ricotta filling, nestled in marinara, and baked until the mozzarella bubbles and turns golden.

Crispy Zucchini and Squash
Golden, garlicky rounds with a deep-fried crunch made lighter in the air fryer. A fast, vitamin-packed side everyone devours.

Chicken Parmesan Meatballs
Tender chicken meatballs simmered in marinara, finished with melted mozzarella and basil for cozy, weeknight Italian comfort in every bite.
Did You Make This?
Leave a comment & rating below or tag @velvetyum on social media!
Rate This Recipe
Share This Recipe
Enjoyed this recipe? Share it with friends and family, and don't forget to leave a review!
Comments (1)
This recipe looks amazing! Can't wait to try it.
Comments are stored locally in your browser. Server comments are displayed alongside your local comments.

Hi, I'm Emma!
What's Popular

30-Minute Meals!
Join to receive our email series which contains a round-up of some of our quick and easy family favorite recipes.