
>>

A quick and irresistible fried mushrooms recipe from Jessica Burgess — choose between a thin dusting or a thicker breading for perfect crunch every time.

This fried mushrooms recipe has been one of my quickest go-to starters for lazy weeknights and impromptu gatherings. I first developed these variations while trying to stretch a small package of mushrooms into a shareable snack for a backyard barbecue. The technique is simple but the result is surprisingly addictive: tender, juicy mushroom slices encased in either a light seasoned dusting or a thicker, golden crust. The two breading options make this approach adaptable — choose a thin coat when you want the mushroom flavor to shine, or use the egg-and-flour method for a crunchier bite that stands up to dipping sauces.
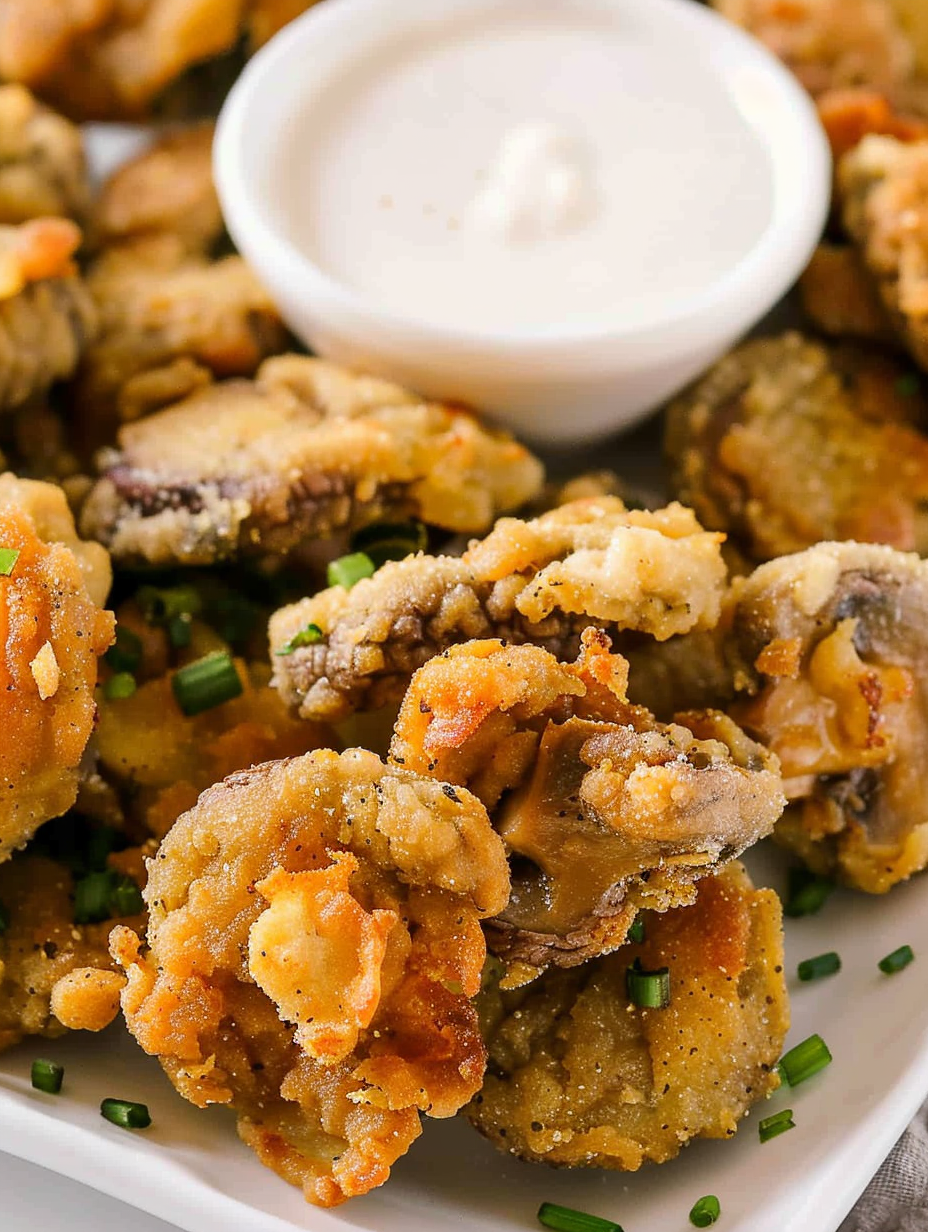
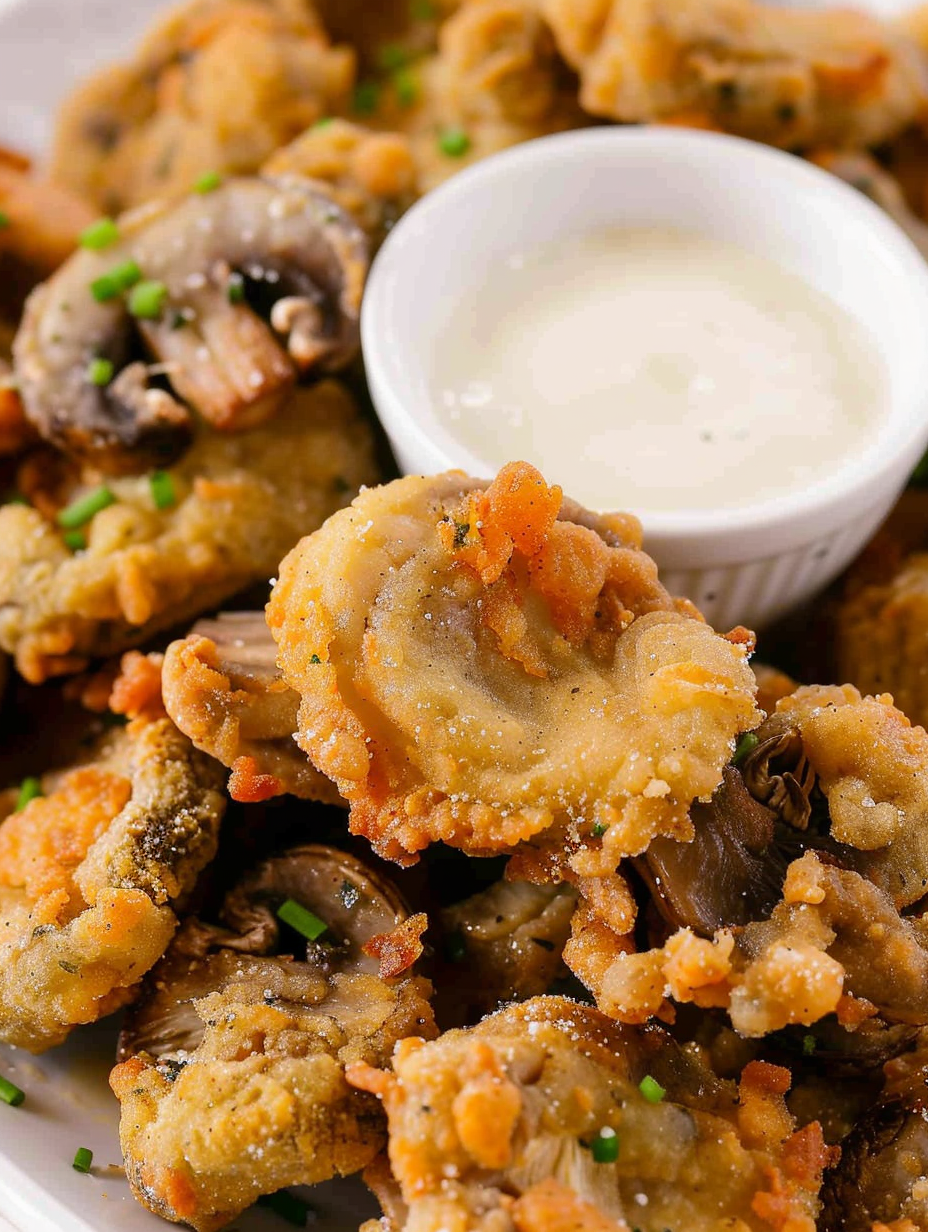
I remember the night this recipe truly became a family favorite: a rainy Friday, a skillet warming on the stove, and the smell of frying mushrooms drawing everyone into the kitchen. They disappeared so fast that I wrote the steps on the back of a takeout menu to make sure I didn't forget the timing. These mushrooms are slightly salty, with a crisp exterior and a meaty interior. Serve them straight from the pan, and you’ll notice how the edges caramelize while the inside stays soft — a textural contrast that makes people keep reaching for another piece.
From my tasting notes and family feedback, the thin dusting is our weekday favorite because it’s fast and showcases the mushroom’s flavor, while the thicker breading is the winner at parties — it holds sauces and stays crunchy longer. My neighbors once asked me for the thicker version’s secret: turning the heat just right so the crust browns quickly without overcooking the interior.
My favorite part of this method is the ease: you can choose the breadcrumb thickness to match the mood. At home we serve the thin version for lighter evenings and the thicker version when guests are in town. One weekend I made both and labeled the plates — they were both gone within 15 minutes, and my kids argued which one was better!
To store leftovers, cool completely and place in an airtight container in the refrigerator for up to 2 days. Reheat in a 400°F oven on a wire rack for 6–8 minutes to regain some crispness; avoid microwaving which makes them soggy. For longer storage, freeze in a single layer on a tray until solid (about 1 hour), then transfer to a freezer bag for up to 3 months. Reheat from frozen in a 400°F oven for 10–12 minutes.
If you need gluten-free options, substitute 1 cup of a 1:1 gluten-free flour blend for the all-purpose flour — results will be similar though slightly less brown. For an egg-free thicker crust, try a mixture of 1/2 cup milk substitute (almond or soy) plus 2 tablespoons cornstarch to mimic adhesion. Swap seasoned salt for a combination of 1 1/2 teaspoons kosher salt, 1/2 teaspoon smoked paprika, and 1/4 teaspoon garlic powder if you prefer to control sodium.
Serve as an appetizer with a trio of dips: classic ranch, spicy Sriracha mayo, and lemon-garlic aioli. For a casual meal, pair with a crisp green salad and crusty bread, or pile onto toasted buns with pickles and slaw for mushroom sliders. Garnish with chopped parsley and a light squeeze of lemon to cut through the richness.
Fried mushrooms are a popular pub snack and bar food in American cuisine, where simple battered and fried vegetables became staples of casual dining. While fried mushrooms are widespread, regional versions vary — some use beer batter for a yeasty crust, others add cornmeal for extra crunch. This version leans on a straightforward seasoned-flour technique common in home kitchens for fast, reliable results.
In autumn, swap white button mushrooms for small oyster or shiitake for deeper umami; add a sprinkle of ground porcini to the flour for earthier flavor. In spring, finish with fresh lemon zest and chopped chives. For holiday parties, serve thicker-breaded mushrooms on a platter with cranberry-maple dipping sauce for a festive twist.
To speed up party prep, slice mushrooms and pre-mix the seasoned flour the day before. Store the flour mix in an airtight container and refrigerate sliced mushrooms on a paper towel–lined tray for up to 24 hours. For make-ahead frying, bread the mushrooms and rest them on a tray in the fridge up to 30 minutes before frying to help the coating adhere.
These fried mushrooms are a testament to how a simple technique can amplify humble ingredients into something memorable. Whether you choose a thin dusting or a thicker crust, the key is controlling oil temperature and avoiding overcrowding the pan. Enjoy the process — and be prepared to share the recipe because your friends will ask for it.
Pat mushrooms completely dry after rinsing to prevent oil splatter and soggy coating.
Test oil temperature by sprinkling a pinch of flour — if it sizzles, the oil is ready (about 350–375°F).
Do not overcrowd the pan; fry in batches to maintain steady temperature and even browning.
For extra-crispy results, rest breaded mushrooms on a tray for 10 minutes before frying to help the coating set.
This nourishing crispy fried mushrooms recipe is sure to be a staple in your kitchen. Enjoy every moist, high protein slice — it is perfect for breakfast or as a wholesome snack any time.
Yes. For thin breading omit the eggs entirely and toss the mushrooms directly in the seasoned flour so the mushroom flavor is more pronounced.
Reheat in a 400°F oven for 6–10 minutes on a wire rack to restore crispness. Avoid microwaving.
This Crispy Fried Mushrooms recipe makes perfectly juicy, tender, and flavorful steak every time! Serve with potatoes and a side salad for an unforgettable dinner in under 30 minutes.
Warm the oil in a heavy skillet over medium heat until shimmering (or preheat deep fryer to 375°F). Test readiness by sprinkling a pinch of flour — it should sizzle immediately.
In a large bowl or zip-top bag, whisk together 1 cup all-purpose flour and 2 tablespoons seasoned salt until evenly blended.
Toss sliced mushrooms into the seasoned flour and shake or stir until lightly coated. This thin dusting yields a delicate crust and highlights the mushroom’s flavor.
Beat 2 large eggs in a shallow dish, dip mushroom slices in egg, then press into seasoned flour for a thicker breading that fries to a golden, crunchy shell.
Fry coated mushrooms in batches for 2–3 minutes until golden brown, turning if needed. Transfer to paper towels to drain excess oil and season lightly while hot.
Serve immediately with favorite dipping sauces, a squeeze of lemon, or a sprinkle of chopped parsley for freshness.
Last Step: Please leave a rating and comment letting us know how you liked this recipe! This helps our business to thrive and continue providing free, high-quality recipes for you.
Leave a comment & rating below or tag
@velvetyum on social media!

Tender grilled zucchini rolled with a basil-kissed ricotta filling, nestled in marinara, and baked until the mozzarella bubbles and turns golden.

Golden, garlicky rounds with a deep-fried crunch made lighter in the air fryer. A fast, vitamin-packed side everyone devours.

Tender chicken meatballs simmered in marinara, finished with melted mozzarella and basil for cozy, weeknight Italian comfort in every bite.
Leave a comment & rating below or tag @velvetyum on social media!
Enjoyed this recipe? Share it with friends and family, and don't forget to leave a review!
This recipe looks amazing! Can't wait to try it.
Comments are stored locally in your browser. Server comments are displayed alongside your local comments.

Join to receive our email series which contains a round-up of some of our quick and easy family favorite recipes.
