
Crispy Mac and Cheese Balls

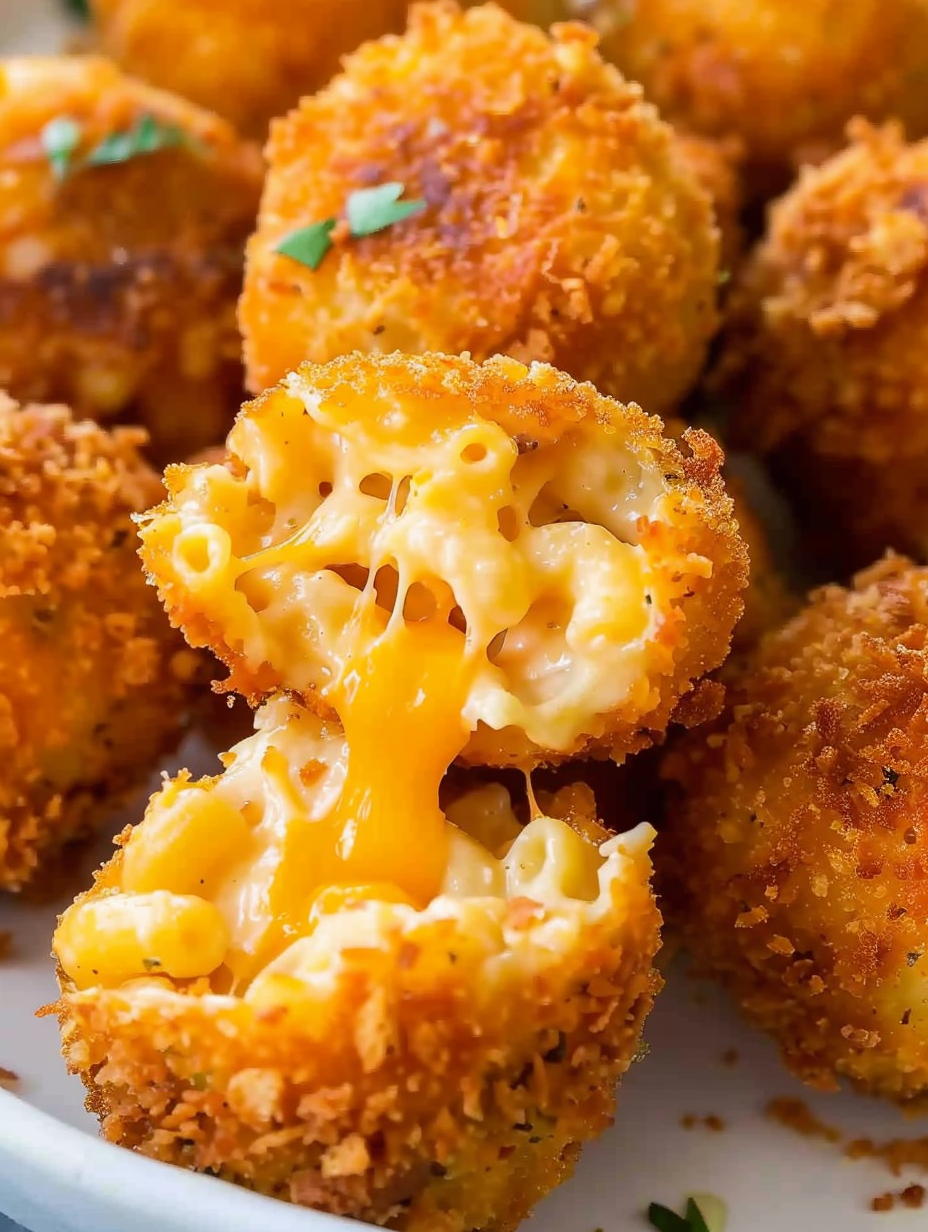
Leftover mac and cheese transformed into golden, crunchy little spheres: crispy outside, molten and cheesy inside. Perfect as a snack, appetizer, or party hit.
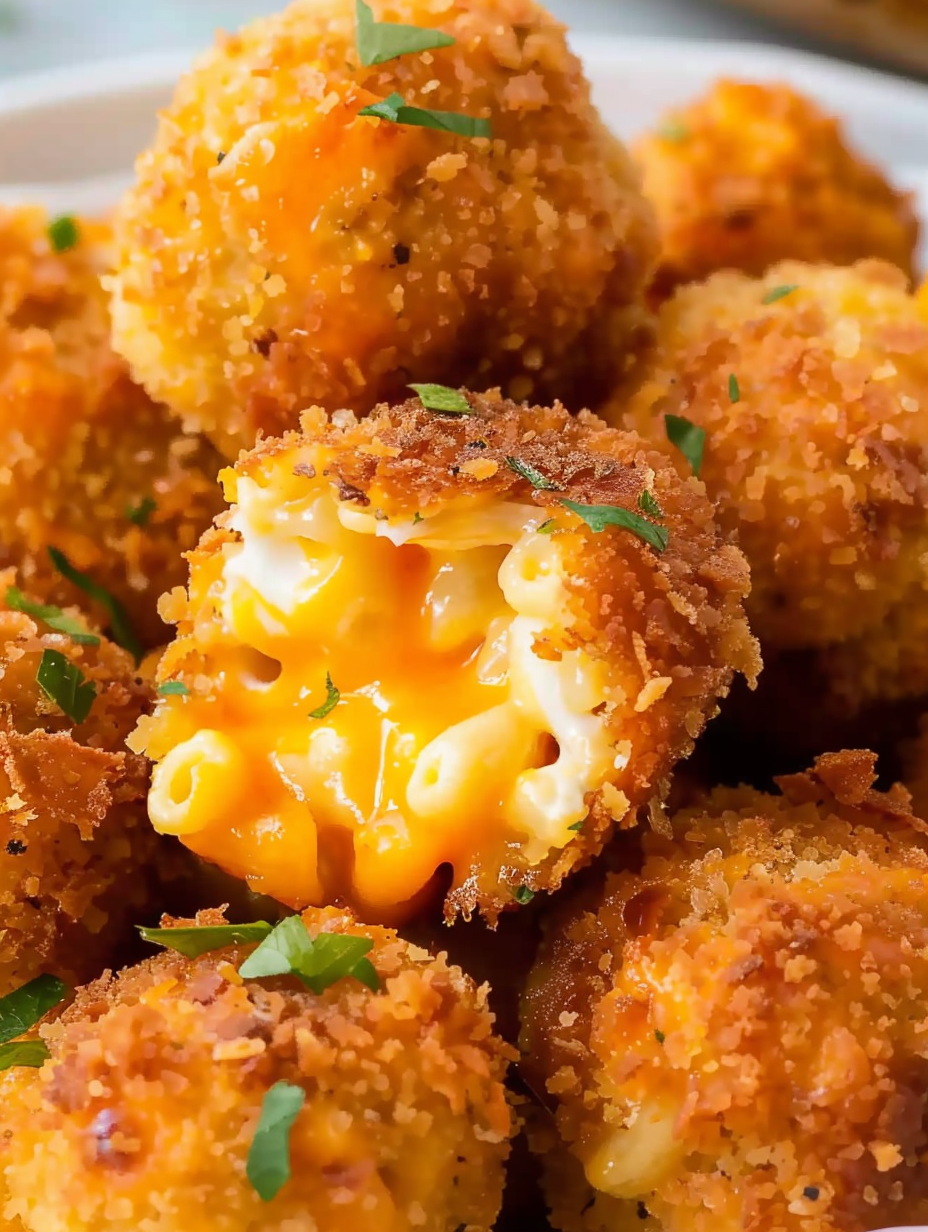
This recipe for Crispy Mac and Cheese Balls began as a practical solution to leftover pasta night and quickly turned into one of my family's most-requested treats. I discovered the magic when I was determined to make something irresistible out of last night’s dinner: cold, firm mac and cheese rolled, coated, and fried until the exterior was deeply golden and the center was gooey. The contrast between a delicate, crunchy shell and the silky, cheesy interior is what makes these irresistible. They’re the kind of food that prompts people to linger in the kitchen, trading bites and stories.
I first made them on a rainy weekend when guests were coming by and I didn’t want to spend hours in the kitchen. With just a handful of pantry staples—good sharp cheddar, a sprinkle of parmesan, eggs, and a crisp breadcrumb coating—these came together in under an hour of active work. They’re comforting, playful, and endlessly adaptable. Serve them at a game night, as a side for a casual dinner, or on a tray for a potluck and watch them disappear. My kids nicknamed them "cheese bombs," and the name has stuck because every bite feels like a small, joyous explosion of flavor.
Why You'll Love This Recipe
- Transforms leftovers into a craveable finger food—perfect when you don’t want to waste extra mac and cheese and want something exciting instead of reheating.
- Quick to prepare: active prep takes about 20 minutes, with short fry times; ideal for last-minute entertaining or a spontaneous snack attack.
- Uses pantry staples and flexible ingredients—swap cheeses, breadcrumbs, or dipping sauces to suit what you have on hand.
- Make-ahead friendly: shape and chill the balls in advance, then fry just before serving for a fresh, hot crunch.
- Crowd pleasing and shareable: these work as appetizers, sides, or even a main for a casual meal, and they pair beautifully with tangy or spicy dips.
- Accessible technique: no special tools required—an ice cream scoop and a deep pot are enough.
Personally, these were a revelation at a backyard gathering where people kept coming back for "one more." I remember watching a friend dip one into a spicy ranch and say it was the perfect comfort-food upgrade. Over time I refined the method—chilling long enough, using panko for extra crunch, and keeping the oil temperature steady—and each tweak made the results more reliable and more delicious.
Ingredients
- Leftover macaroni and cheese (1 pound): Firm, cold leftovers work best—refrigerate homemade mac for at least 3 hours so it binds well. If using a store-bought frozen container, thaw and refrigerate until firm. The drier and cooler it is, the easier to shape.
- Shredded cheddar cheese (1 cup): Sharp or extra-sharp cheddar adds a strong cheesy backbone. I prefer block cheddar grated at home for the best melt and flavor. If using pre-shredded, shake to remove clumps and pat dry.
- Shredded Parmesan (1 cup): Adds umami and a slightly nutty, salty lift. Freshly grated Parmigiano-Reggiano is ideal; it helps the interior hold together and deepens the flavor profile.
- Eggs (2): Beaten with a splash of milk to create an egg wash that helps breadcrumbs adhere and gives a golden color when fried.
- Milk (3 tablespoons): Just enough to loosen the eggs so the wash coats evenly. Whole or 2% milk works fine.
- Bread crumbs or panko (2 cups): Panko yields a lighter, airier crust while classic breadcrumbs give a denser coating. For the crispiest result, use panko or combine 50/50 with regular crumbs.
- Oil for frying: Neutral oil with high smoke point such as vegetable or canola. You’ll need enough to deep-fry—about 3 to 4 cups depending on your pot size.
Instructions
Chill the mac and cheese: Place the leftover macaroni and cheese in the refrigerator for at least 3 hours, preferably overnight. Cooling firms up the sauce matrix and allows starches to set so the pasta holds its shape when rolled. If it’s still soft after chilling, stir in additional shredded cheddar or a few tablespoons of cooked, mashed potato to bind. Combine cheeses and test texture: In a large bowl, add the chilled mac, then fold in 1 cup cheddar and 1 cup parmesan. The extra cheese helps create a cohesive interior that melts without oozing prematurely. The mixture should be moldable but not runny—if it’s loose, add more grated cheese a little at a time until it holds a scoop shape. Prepare the dredging station: Whisk the eggs with 3 tablespoons milk in a shallow bowl to make an egg wash. In a separate shallow dish, pour the breadcrumbs or panko. Keep one hand for wet and one hand for dry to avoid clumps. This three-step coating (shape, egg, crumbs) creates a seal that crisps perfectly. Shape the balls: Use an ice cream scoop or two spoons to portion the mac and cheese into roughly 15 equal balls. Compact each scoop gently in your palms to smooth edges so they don’t fall apart when frying. If you prefer neat squares, press the mixture into a plastic-lined pan and cut into pieces before coating. Coat and chill again: Dip each ball into the egg wash, then roll thoroughly in breadcrumbs. Place on a parchment-lined tray and refrigerate for at least 30 minutes. Chilling firms the coating and reduces the risk of the balls disintegrating when they hit the hot oil. Heat oil and fry: Heat oil in a deep pot over medium-high heat to 350°F (175°C). Fry balls in batches—do not overcrowd the pot. Cook each batch for about 3 to 4 minutes, turning gently so all sides become evenly golden and the interior is warmed through. Use a candy thermometer to maintain temperature; dropping oil heat leads to greasy, soggy results. Drain and serve: Remove with a slotted spoon and transfer to a paper towel-lined plate to absorb excess oil. Serve hot with your favorite dipping sauces—spicy mayo, marinara, or a tangy ranch all work beautifully.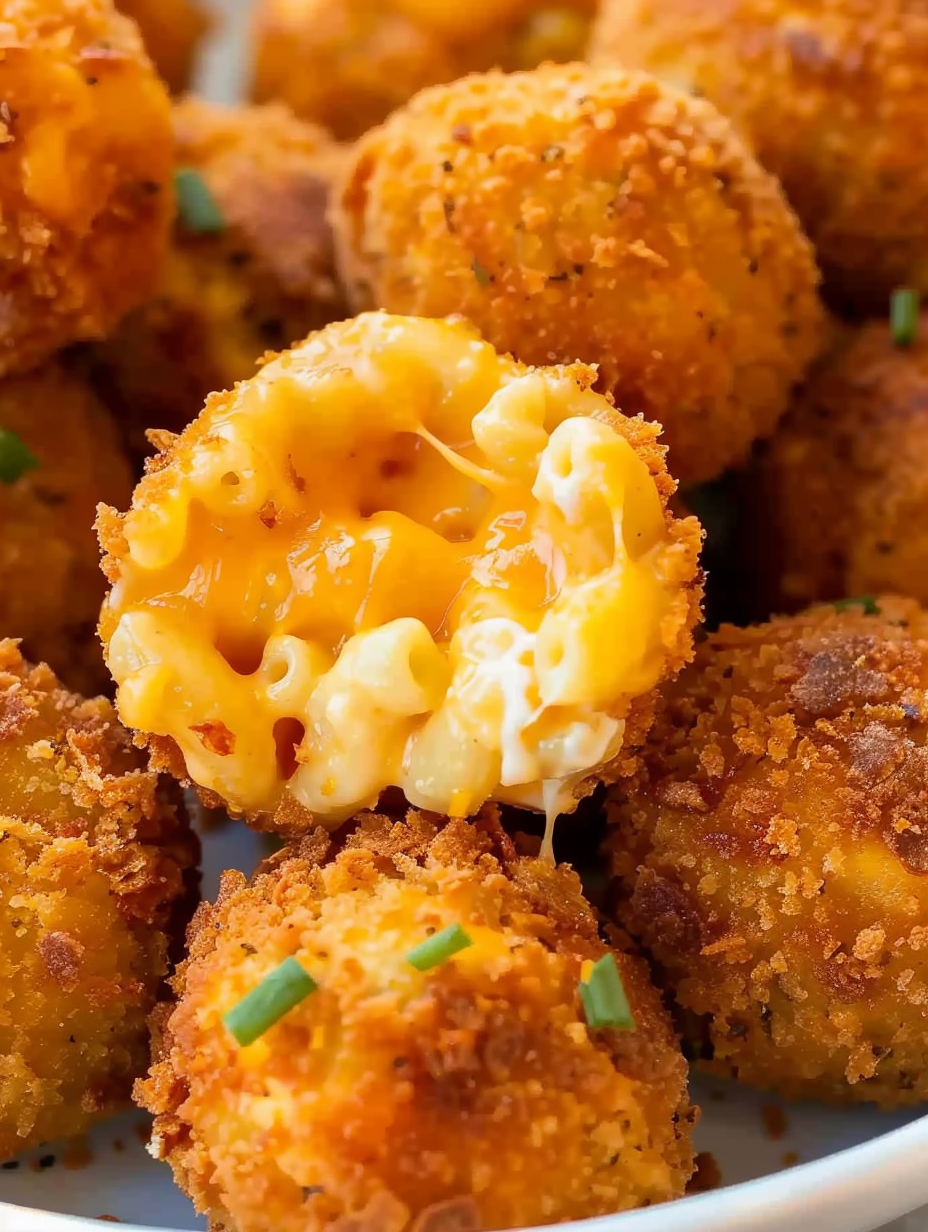
You Must Know
- Chilling is essential—refrigerate the assembled mixture for at least 3 hours and the coated balls for a minimum 30 minutes to ensure structural integrity while frying.
- Use panko or a panko blend for the crispiest coating; regular breadcrumbs can work but will yield a denser crust and absorb more oil.
- Maintain oil at 350°F (175°C); lower temps cause soggy results, higher temps risk burning the exterior before the center heats through.
- These freeze beautifully: flash-freeze on a tray, then transfer to a freezer bag for up to 3 months. Fry from frozen, adding a minute or two to the cook time.
- High in comfort and calories—serve with bright, acidic dips or pickled accompaniments to balance richness.
My favorite part is watching guests break one open: the warm, stretchy cheese spilling out is a universal joy. At a recent holiday gathering, someone requested I double the batch and hide them to save for later—no one did. These always disappear fast, and I love how they turn simple leftovers into something celebratory.
Storage Tips
Store any leftover cooled mac and cheese balls in an airtight container in the refrigerator for up to 3 days. To keep the coating crisp, reheat in a 375°F (190°C) oven on a wire rack for 8–10 minutes until heated through. For longer storage, freeze the coated but uncooked balls on a parchment-lined tray until solid, then transfer to a labeled freezer bag for up to 3 months. When frying from frozen, keep oil temperature steady and add an extra 60–90 seconds of cook time. Avoid microwaving as it makes the crust soggy and the interior rubbery.
Ingredient Substitutions
If you don’t have cheddar, use a mix of Gruyère and Monterey Jack for a more refined flavor and excellent melt. For a tangy pop, swap half the parmesan for Pecorino Romano. Gluten-free? Use certified gluten-free panko or crushed gluten-free crackers and ensure the macaroni was made from a gluten-free pasta. To make them dairy-free, use a firm dairy-free cheese that melts well and an egg substitute like a chickpea flour slurry or aquafaba, though binding and texture will differ slightly.
Serving Suggestions
Present these on a large platter with a trio of dipping sauces: spicy sriracha mayo, classic marinara, and a bright lemon-garlic yogurt dip. For a party, garnish with chopped chives and flaky sea salt, and add small forks or toothpicks for easy grabbing. Pair with a crisp green salad or roasted vegetables for a balanced plate, or serve alongside sliders for a playful comfort-food spread. They also make a great accompaniment to soups—dip a cheese ball into a bowl of tomato soup for an elevated grilled-cheese vibe.
Cultural Background
Rolling and frying comfort-food leftovers has roots in many culinary traditions where frugality and creativity intersect. In American home cooking, transforming macaroni and cheese into bite-sized fried morsels is part of the larger trend of elevating everyday dishes into shareable snacks. Similar concepts exist worldwide—Spain’s croquetas use béchamel and ham, while Japan’s korokke repurpose mashed potatoes. The mac and cheese ball is a modern, playful American adaptation that celebrates texture contrasts and communal eating.
Seasonal Adaptations
In colder months, fold in roasted butternut squash or caramelized onions to add warmth and depth. For summer, use a lighter cheese blend and add fresh herbs like basil or chives and serve with a chilled tomato-basil dip. Around holidays, fold in chopped cooked bacon or a pinch of nutmeg for festive warmth. The recipe’s flexibility means you can tailor the interior to seasonal produce—sautéed mushrooms in autumn, roasted peppers in late summer.
Meal Prep Tips
Make the mac and cheese a day ahead and chill overnight to maximize firmness. Form and coat the balls the next day, then refrigerate until ready to fry. For freezer-friendly prep, flash-freeze coated balls on a tray before bagging—this lets you pull out just the number you need. Label bags with date and reheating instructions. When preparing for a party, fry in small batches and keep finished balls warm on a baking sheet in a 200°F oven while you finish the rest.
These Crispy Mac and Cheese Balls are proof that a little technique—chilling, coating, and monitoring oil temperature—can make leftovers feel special. They bring people together around a shared plate and are endlessly adaptable, so I hope you make them your own and discover the little twists that become family favorites.
Pro Tips
Chill the mac and cheese thoroughly for at least 3 hours so it binds well and is easy to shape.
Use panko or a panko blend for the crispiest coating and the lightest texture.
Keep oil at 350°F (175°C) and fry in small batches to maintain consistent temperature.
Grate cheese from a block for better melt and texture; if using pre-shredded, pat dry.
Flash-freeze coated balls for long-term storage and fry them straight from the freezer.
This nourishing crispy mac and cheese balls recipe is sure to be a staple in your kitchen. Enjoy every moist, high protein slice — it is perfect for breakfast or as a wholesome snack any time.
FAQs about Recipes
Can I freeze these ahead of time?
Yes. Prepare and coat the balls, then flash-freeze on a tray and transfer to a freezer bag for up to 3 months. Fry from frozen, adding 60–90 seconds to the cook time.
How do I prevent them from falling apart while frying?
Maintain oil at about 350°F (175°C) and fry in small batches to avoid temperature drops; this ensures a crispy exterior and a heated interior without bursting.
Tags
Crispy Mac and Cheese Balls
This Crispy Mac and Cheese Balls recipe makes perfectly juicy, tender, and flavorful steak every time! Serve with potatoes and a side salad for an unforgettable dinner in under 30 minutes.
Ingredients
Base
Cheeses
Binders & Coating
Frying
Instructions
Chill the base
Place leftover mac and cheese in the refrigerator for at least 3 hours or overnight to firm up. This step ensures the mixture binds so you can shape it without leaking.
Add extra cheese and test texture
In a large bowl, fold in the shredded cheddar and parmesan. If the mac is still too soft, add more grated cheese until the mixture holds a scoop shape without collapsing.
Prepare dredging station
Whisk eggs with milk in a shallow bowl for an egg wash. Place breadcrumbs or panko in a second shallow dish. Keep one hand for wet and one for dry to avoid clumping.
Shape the balls
Use an ice cream scoop or two spoons to portion about 15 equal balls. Firmly but gently roll each scoop in your hands to form compact spheres that will hold together when fried.
Coat and chill
Dip each ball into the egg wash, then roll thoroughly in breadcrumbs until evenly coated. Place on a parchment-lined sheet and refrigerate for at least 30 minutes to set the coating.
Heat oil and fry
Heat oil in a deep pot to 350°F (175°C). Fry the balls in batches without overcrowding for about 3–4 minutes, turning occasionally until evenly golden and crispy.
Drain and serve
Transfer fried balls to a paper towel-lined plate to drain excess oil. Serve immediately with dipping sauces such as marinara, spicy mayo, or ranch.
Last Step: Please leave a rating and comment letting us know how you liked this recipe! This helps our business to thrive and continue providing free, high-quality recipes for you.
Nutrition
Did You Make This?
Leave a comment & rating below or tag
@velvetyum on social media!
Categories:
You might also like...

Cheesy Zucchini Rollatini
Tender grilled zucchini rolled with a basil-kissed ricotta filling, nestled in marinara, and baked until the mozzarella bubbles and turns golden.

Crispy Zucchini and Squash
Golden, garlicky rounds with a deep-fried crunch made lighter in the air fryer. A fast, vitamin-packed side everyone devours.

Chicken Parmesan Meatballs
Tender chicken meatballs simmered in marinara, finished with melted mozzarella and basil for cozy, weeknight Italian comfort in every bite.
Did You Make This?
Leave a comment & rating below or tag @velvetyum on social media!
Rate This Recipe
Share This Recipe
Enjoyed this recipe? Share it with friends and family, and don't forget to leave a review!
Comments (1)
This recipe looks amazing! Can't wait to try it.
Comments are stored locally in your browser. Server comments are displayed alongside your local comments.

Hi, I'm Emma!
What's Popular

30-Minute Meals!
Join to receive our email series which contains a round-up of some of our quick and easy family favorite recipes.