
Christmas Tree Brownies

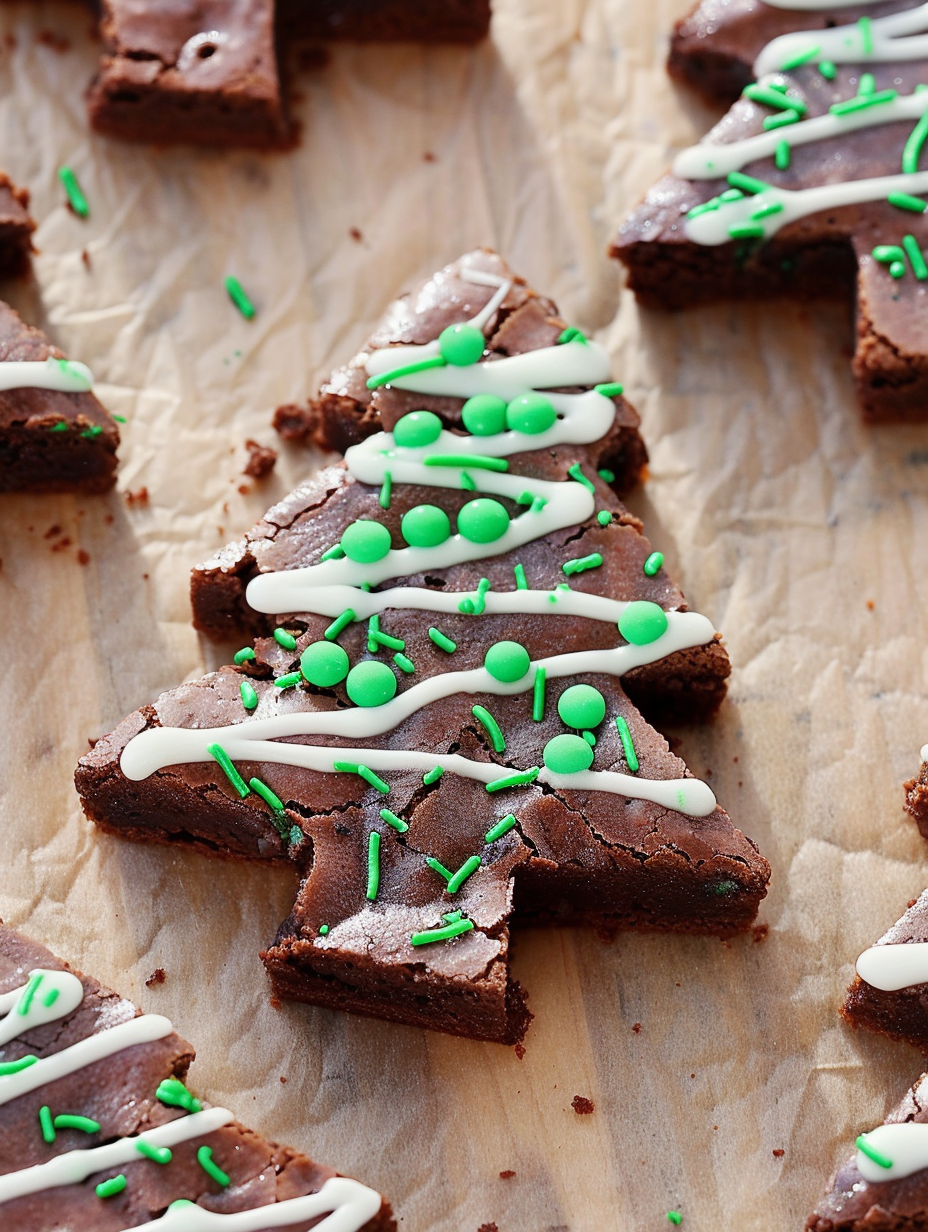
Fudgy brownies cut into festive trees and decorated with green and white icing — the perfect kid-friendly holiday activity and dessert.
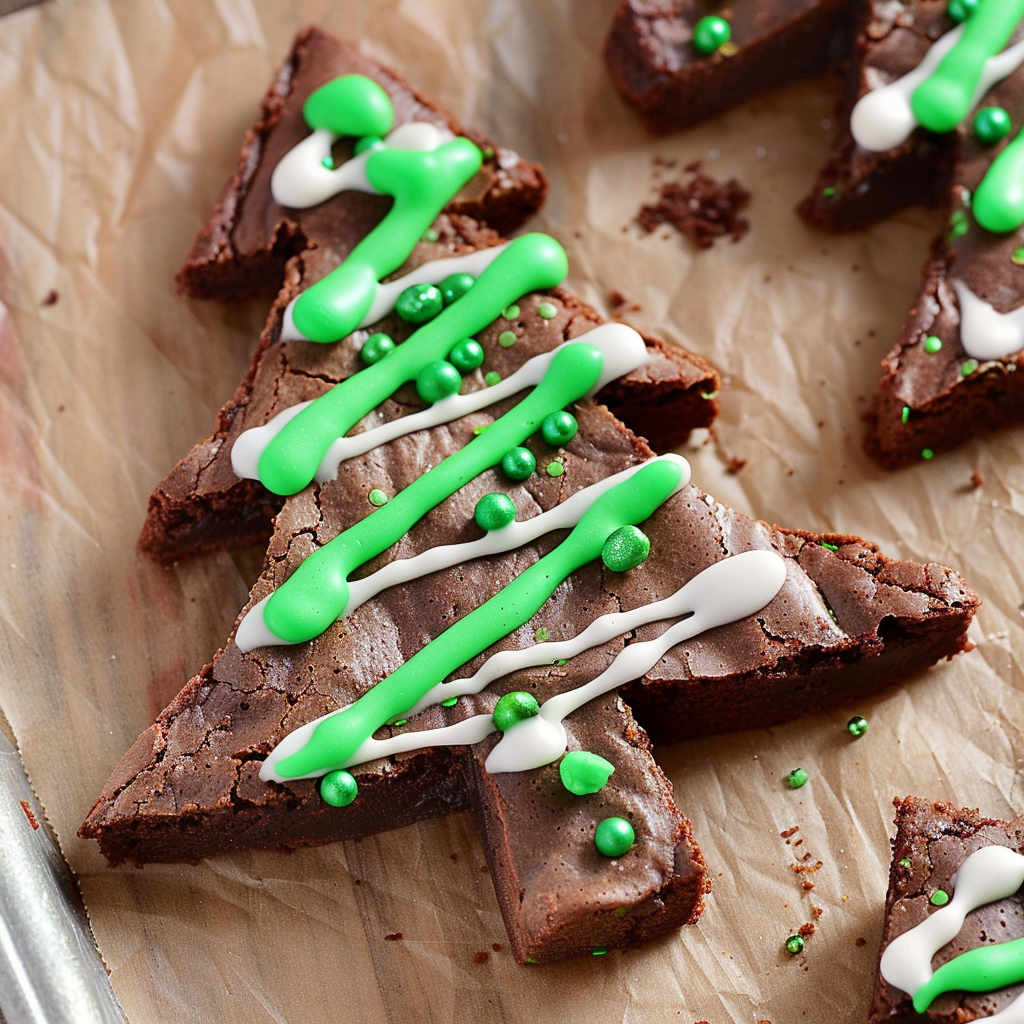
This holiday season I started making these Christmas Tree Brownies with my children and they quickly became our favorite hands-on dessert. I discovered the idea during a baking afternoon when I wanted something chocolatey that also doubled as a craft activity for the kids. The result is a chewy, fudgy base cut into little evergreen shapes, bright green icing piped in zigzags, and sprinkles for instant festive charm. It’s the kind of recipe that turns baking into an event — laughter, sticky fingers, and steaming mugs of cocoa all around.
What makes these especially memorable is the texture contrast: a slightly crisp top and dense, moist interior that holds its shape when chilled, making it ideal for precise cookie-cutter work. I first tried them at a holiday party and neighbors raved about the balance of cocoa depth and sweet vanilla frosting. Decorating becomes a shared tradition — I assemble the batter, the kids cut the trees, and everyone decorates their own, which makes every platter unique and full of personality.
Why You'll Love This Recipe
- Fuss-free sweet that doubles as a holiday craft: simple bake, then everyone decorates — perfect for busy evenings and family gatherings.
- Uses pantry staples like all-purpose flour, cocoa, butter, sugar and eggs so you rarely need a special store run for star ingredients.
- Ready from start to finish in about 50 minutes (10 minutes prep, 30 minutes bake, 10 minutes decorating) — quick enough for last-minute parties.
- Kid-friendly decorating step teaches piping basics and lets young cooks feel proud of their creations while learning kitchen skills.
- Make-ahead friendly: brownies hold up well chilled and can be cut and briefly frozen for later decorating.
- Customizable toppings and icing colors let you adapt for dietary needs or party themes without changing the chocolate base.
I’ve watched reluctant bakers become excited decorators when offered a set of sprinkles and a piping bag. At our first family trial, my youngest insisted on adding extra sprinkles and declared her tree the most beautiful — she was right. The interactive nature makes this more than a dessert; it’s a memory maker that fills the kitchen with holiday noise and joy.
Ingredients
- All-purpose flour: Use 3/4 cup of a reliable brand like King Arthur for consistent texture; it provides structure without making the brownies cakey.
- Cocoa powder: 3/4 cup unsweetened cocoa (Dutched or natural is fine; Dutch-process gives a deeper, smoother chocolate note).
- Kosher salt: 3/4 teaspoon helps balance the sweetness and brings out the chocolate flavor — use Diamond Crystal or Morton adjusted to your usual measure.
- Unsalted butter: 15 tablespoons melted (about 1 7/8 sticks) gives richness and fudgy density; melt gently and cool slightly before adding to eggs.
- Sugar: 1 1/2 cups granulated sugar for classic sweetness and a crackly top; you can split with brown sugar for a chewier profile.
- Vanilla extract: 2 teaspoons pure vanilla enhances depth — Nielsen-Massey or equivalent adds a clean flavor note.
- Eggs: 3 large eggs at room temperature to help emulsify the batter and create that shiny top.
- Powdered sugar: 1 cup for the icing; sift to avoid lumps and create a smooth pipeable glaze.
- Milk: 1–2 tablespoons to thin the icing — start with 1 tablespoon and add more if needed.
- Food coloring and sprinkles: Use green coloring (dye-free if preferred) and holiday sprinkles for instant seasonal flair.
Instructions
Preheat and prepare:Preheat the oven to 325°F. Grease and line a 9×13-inch baking pan with parchment, leaving an overhang for easy removal — this ensures even baking and clean edges when cooled.Mix dry ingredients:Whisk together 3/4 cup all-purpose flour, 3/4 cup unsweetened cocoa, and 3/4 teaspoon kosher salt in a medium bowl until fully combined and aerated; this prevents lumps and distributes salt evenly.Combine butter, sugar, vanilla:In a large bowl, use a hand or stand mixer on low to combine 15 tablespoons melted butter, 1 1/2 cups sugar, and 2 teaspoons vanilla. Mix until glossy and slightly thickened, about 1 minute.Add eggs:Add 3 large room-temperature eggs one at a time, mixing briefly after each addition until smooth. This creates an emulsion that traps air for a shiny brownie top.Incorporate dry ingredients:Fold the dry cocoa-flour mixture into the wet ingredients slowly, mixing just until no streaks remain to avoid overworking the gluten and keeping the brownies tender.Bake:Pour batter into the prepared 9×13 pan, smoothing the surface. Bake at 325°F for 30 minutes — a toothpick should come out with a few moist crumbs, not raw batter. Avoid overbaking to keep fudginess.Cool and cut:Allow brownies to cool completely, then chill in the fridge for at least 30 minutes for firmer cutting. Use a Christmas tree cookie cutter and start cutting from the edges to maximize shapes.Prepare icings and decorate:Mix 1 cup powdered sugar with 1–2 tablespoons milk to desired consistency. Divide and tint half green. Transfer both into plastic zip-top bags, snip a small corner, and pipe zigzags. Add sprinkles immediately so they adhere.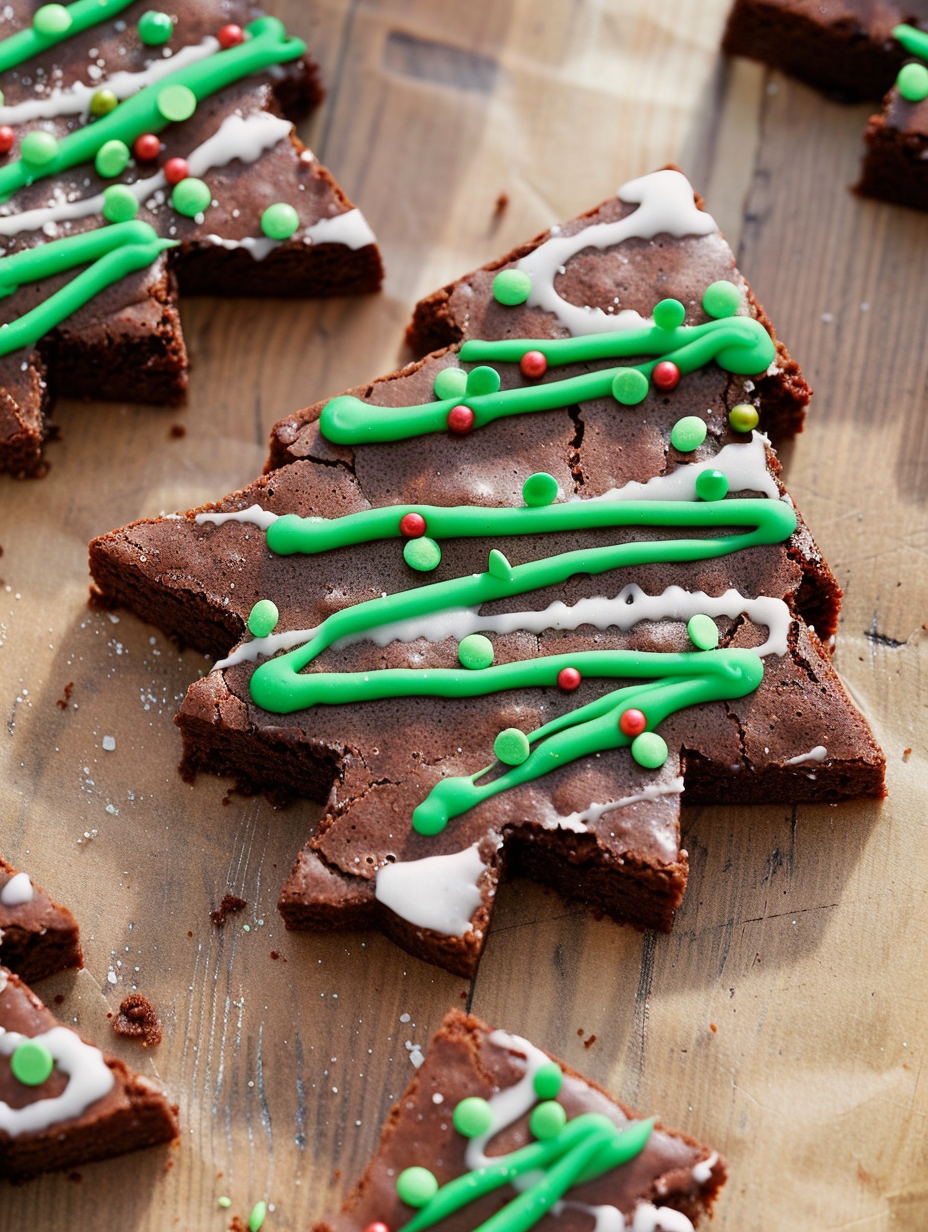
You Must Know
- Chill before cutting: cooled and slightly chilled brownies cut cleaner and keep sharp tree edges, which is essential for decorating precision.
- Decorating flow: begin with a very small snip in the bag corner and test the flow on a plate to avoid rushed, messy piping.
- Sprinkle timing: add sprinkles immediately after piping so they set into the wet icing rather than sitting on top and falling off.
- Make ahead: baked and uncut brownies can be refrigerated for up to 3 days or frozen up to 3 months; decorate after thawing.
- Texture note: these yield fudgy, dense brownies — for cakier results, add one additional tablespoon of flour and increase baking time slightly.
My favorite part of these brownies is the decorating bench we set up: rows of colorful sprinkles, multiple piping colors, and everyone’s unique style on display. Once, a neighbor child combined tiny star sprinkles and nonpareils to create a “starry forest” effect that had us all laughing and taking photos. That memory — and the little sugar sparkles on everyone’s cheeks — is what I bake for.
Storage Tips
Store undecorated, cooled brownies in an airtight container in the refrigerator for up to 3 days; this helps maintain shape and makes cutting neater. If decorated, place a layer of parchment between stacked layers to prevent smudging. For longer storage, wrap tightly in plastic wrap and freeze for up to 3 months; thaw in the refrigerator overnight and bring to room temperature before serving. To refresh slightly stale edges, warm individual trees in a 300°F oven for 5–7 minutes, watching carefully so the icing doesn’t soften too much.
Ingredient Substitutions
If you need to adapt: swap half the butter for neutral oil for a slightly lighter crumb, or replace granulated sugar with 1 1/4 cups of a baking-friendly brown sugar mix to add chew and molasses notes. For dairy-free versions, use vegan butter and a non-dairy milk in the icing; keep in mind texture will shift a bit. Use gluten-free 1:1 flour blend instead of all-purpose — results may be crumblier but still delicious. For less sugar, reduce granulated sugar to 1 1/4 cups and add a pinch more salt to balance.
Serving Suggestions
Serve the trees on a platter lined with evergreen sprigs for a festive touch; pair with warm drinks like cocoa, spiced cider or an espresso for adult guests. For a party, arrange in concentric circles on a tiered stand to resemble a decorated forest. Garnish with a dusting of powdered sugar “snow” or place a small edible gold star candy on each tree tip for a jewel-like finish. These also work well plated with a scoop of vanilla ice cream and a drizzle of warm chocolate sauce for a richer dessert.
Cultural Background
Decorated shaped sweets have long been part of holiday traditions in many cultures — from German lebkuchen shaping to American sugar cookie decorating. These chocolate trees are a modern American holiday adaptation, combining the classic brownie with the communal joy of decorating shaped cookies. The idea reflects the holiday emphasis on shared preparation and decorative expression, turning simple ingredients into a seasonal ritual that invites everyone to participate and celebrate together.
Seasonal Adaptations
For winter, use peppermint or orange extract in part of the icing for a holiday twist. In spring, swap green for pastel colors and use flower-shaped sprinkles. Make a Halloween version by tinting icing neon colors and using star or bat cutters. For an adult gathering, add a tablespoon of espresso or a splash of bourbon to the batter to deepen flavor and pair with robust drinks. Textural additions like chopped toasted nuts or a swirl of caramel before baking also tailor the base to different seasonal tastes.
Meal Prep Tips
Batch the base brownies on a weekend: bake several pans, cool, and either cut and freeze un-decorated trees or freeze whole slabs. Store frozen cut trees on a tray until firm, then transfer to a freezer bag. For weekday entertaining, thaw and decorate an hour before serving. Keep a decorating kit assembled with powdered sugar, a small bottle of milk, food coloring, and disposable piping bags so you can quickly set up a decorating station whenever guests arrive.
These brownies are an invitation to slow down and enjoy the process: baking, cooling, cutting, and the final joyful mess of decorating. I hope your kitchen fills with the same laughter and warmth ours does when we make these each year — happy baking and even happier decorating!
Pro Tips
Chill the pan of brownies for 30 minutes before cutting to ensure clean shapes and less crumble.
Use room-temperature eggs for a glossy top and even rise when mixing the batter.
Test piping bag flow on a plate before decorating to avoid oversized holes and mistakes.
Add sprinkles immediately after piping so they adhere to wet icing for best presentation.
This nourishing christmas tree brownies recipe is sure to be a staple in your kitchen. Enjoy every moist, high protein slice — it is perfect for breakfast or as a wholesome snack any time.
FAQs about Recipes
Can I make these ahead and freeze them?
Yes — bake the brownies, cool completely, then wrap tightly and freeze. Thaw in the refrigerator overnight before cutting and decorating.
How do I cut clean tree shapes?
Chill the baked brownies for at least 30 minutes until firm before using a cookie cutter for cleaner edges.
Tags
Christmas Tree Brownies
This Christmas Tree Brownies recipe makes perfectly juicy, tender, and flavorful steak every time! Serve with potatoes and a side salad for an unforgettable dinner in under 30 minutes.
Ingredients
For the Brownies
For Decorating
Instructions
Preheat and prepare pan
Preheat oven to 325°F. Grease and line a 9×13-inch pan with parchment, leaving an overhang for easy removal and even baking.
Combine dry ingredients
Whisk together flour, cocoa powder, and kosher salt in a medium bowl to remove lumps and evenly distribute salt.
Mix wet ingredients
Using a hand or stand mixer on low, combine melted butter, granulated sugar, and vanilla until glossy and slightly thickened.
Add eggs
Add eggs one at a time, mixing briefly after each addition to create an emulsion and maintain a shiny surface.
Fold dry into wet
Slowly fold the dry mixture into the wet ingredients until just combined to avoid overworking the batter and toughening the brownies.
Bake
Pour batter into the prepared pan and bake at 325°F for about 30 minutes. A toothpick should come out with a few moist crumbs.
Cool and chill
Cool completely on a rack, then chill at least 30 minutes to firm the slab for cleaner cookie-cutter shapes.
Prepare icing and decorate
Mix powdered sugar with milk to desired consistency, divide, tint half green, transfer to plastic bags, snip corner, pipe zigzags and add sprinkles immediately.
Last Step: Please leave a rating and comment letting us know how you liked this recipe! This helps our business to thrive and continue providing free, high-quality recipes for you.
Nutrition
Did You Make This?
Leave a comment & rating below or tag
@velvetyum on social media!
Categories:
You might also like...

Cheesy Zucchini Rollatini
Tender grilled zucchini rolled with a basil-kissed ricotta filling, nestled in marinara, and baked until the mozzarella bubbles and turns golden.

Crispy Zucchini and Squash
Golden, garlicky rounds with a deep-fried crunch made lighter in the air fryer. A fast, vitamin-packed side everyone devours.

Chicken Parmesan Meatballs
Tender chicken meatballs simmered in marinara, finished with melted mozzarella and basil for cozy, weeknight Italian comfort in every bite.
Did You Make This?
Leave a comment & rating below or tag @velvetyum on social media!
Rate This Recipe
Share This Recipe
Enjoyed this recipe? Share it with friends and family, and don't forget to leave a review!
Comments (1)
This recipe looks amazing! Can't wait to try it.
Comments are stored locally in your browser. Server comments are displayed alongside your local comments.

Hi, I'm Emma!
What's Popular

30-Minute Meals!
Join to receive our email series which contains a round-up of some of our quick and easy family favorite recipes.