
>>

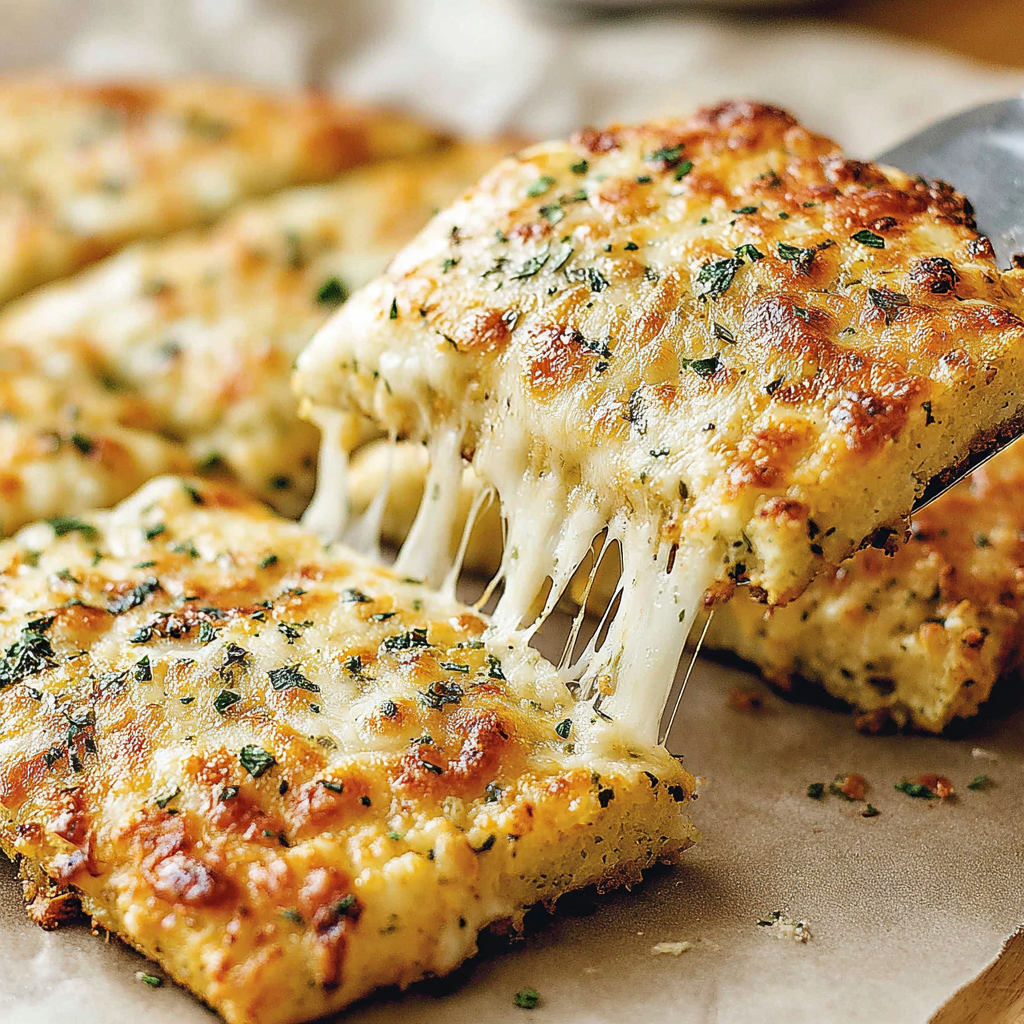
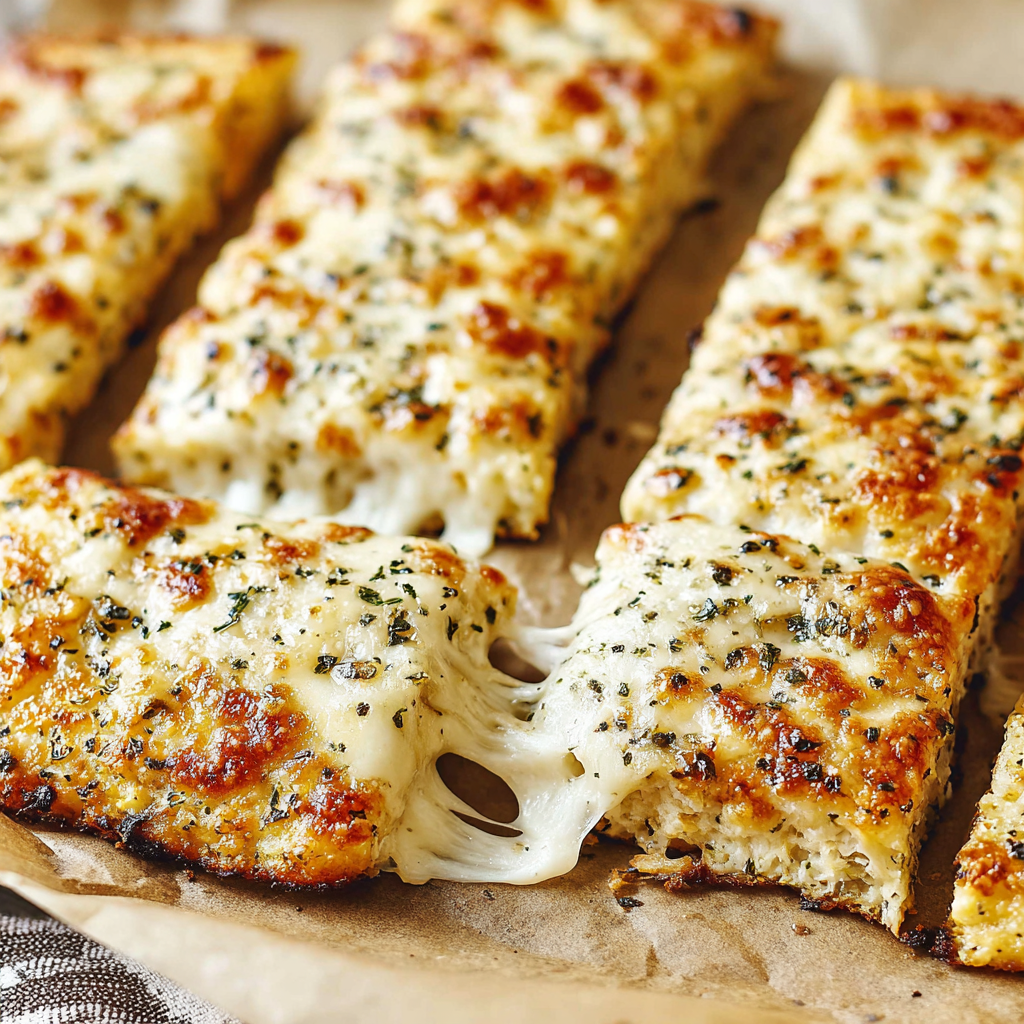
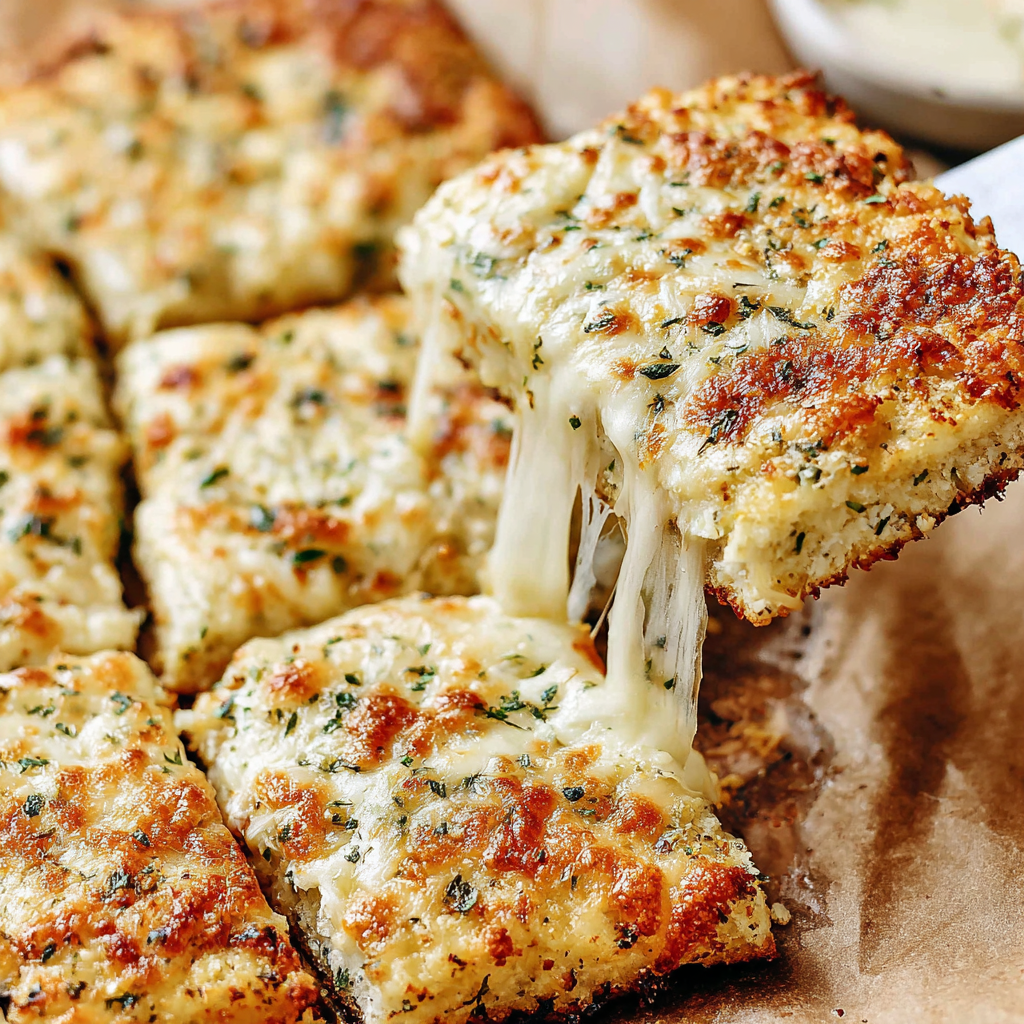
Golden, melty, and irresistibly garlicky, these gluten-free, low-carb cauliflower breadsticks deliver cheesy pull and crisp edges with simple pantry staples.
I first made these cheesy cauliflower breadsticks on a rainy Sunday when the craving for something warm, melty, and comforting hit just a little too hard. I had a head of cauliflower waiting in the crisper and a block of mozzarella begging to be shredded, so I set out to create something that could satisfy the same way classic breadsticks do without the heaviness. The result was better than expected: crisp edges, a tender center that holds together beautifully, and a cheesy top that melts into stretchy bliss. The house smelled like garlic and oregano, and everyone drifted into the kitchen before I even had a chance to slice them.
Since that day, these have become my go-to when I want a crowd-pleasing snack or an easy lunch with a side salad. I love how the crust bakes up golden and sturdy, never soggy, and the flavor is deeply savory thanks to plenty of garlic and a generous hit of oregano. Even the die-hard bread fans in my life reach for seconds. If you are trying to keep things gluten-free or low carb, you will appreciate that you can enjoy every bite without compromise. These are versatile, too: dip them in marinara, drizzle with pesto, or cut them into bite-size squares for game day platters.
When I serve these to friends, the tray disappears before I set out the second dipping sauce. The texture surprises people every time; the crust is firm enough to pick up yet tender when you bite into it. I have tested countless tweaks, and this version nails the balance of moisture, flavor, and browning for reliable results every time.
What I love most is the contrast of textures: crisp, caramelized edges and a tender, cheesy center that pulls apart in satisfying strands. My family now requests these for movie nights with a duo of dips, usually a garlicky marinara and a herby ranch. If you have been disappointed by soggy cauliflower crusts before, this method fixes it with two key moves: a brief pre-cook to tame moisture and a hot oven for confident browning.
Cool breadsticks completely before storing to preserve texture. At room temperature, keep them out no longer than 2 hours. Refrigerate leftovers in a shallow, airtight container with parchment between layers for up to 4 days. For freezing, bake the crusts without the final cheese, cool, and wrap tightly in parchment and foil or a zip-top freezer bag for up to 3 months. Reheat from frozen at 425 F on a parchment-lined sheet for 10 to 12 minutes, then add cheese and bake until melted. Signs of quality include crisp edges, no excess moisture on the pan, and cheese that melts smoothly.
For cheese, swap mozzarella with part-skim provolone or Monterey Jack for a similar melt. If you want extra flavor, fold in 1/4 cup grated Parmesan with the crust cheese. Italian seasoning can replace oregano at a 1:1 ratio. Sensitive to garlic? Use 1 teaspoon garlic powder for a gentler, more even flavor. If your mixture feels too wet, add 2 to 3 tablespoons finely grated Parmesan to help bind. Prefer milder richness? Use 3 eggs instead of 4 and add 2 tablespoons almond flour for structure. For heat, sprinkle crushed red pepper over the topping before the final bake.
Serve straight from the pan with warm marinara, basil pesto, or a creamy ranch for dipping. For a light lunch, pair with a crunchy chopped salad or a bowl of tomato soup. Hosting a game day spread? Cut the crust into smaller squares and offer a trio of dips with a sprinkle of parsley for color. For an Italian-style platter, add olives, roasted peppers, and salami on the side. A final dusting of Parmesan and a sprinkle of crushed red pepper bring a pizzeria vibe to the table.
Cauliflower crusts gained popularity in American home kitchens during the rise of low-carb and gluten-free cooking, becoming a clever stand-in for classic dough. These breadsticks channel the spirit of pizzeria fare while honoring new dietary preferences. The method borrows from Italian flavors like mozzarella, oregano, and garlic, but the technique is distinctly modern: ricing, pre-cooking to control moisture, and baking hot for reliable crispness. It is a delicious example of how home cooks adapt comfort foods to fit changing needs without losing the fun of sharing a cheesy, pull-apart snack.
In summer, fold in chopped fresh basil and finish with cherry tomatoes halved and lightly salted before the final cheese. During fall, add roasted garlic to the crust for deeper sweetness and top with a pinch of dried thyme. For holiday platters, shape into festive rectangles and sprinkle with parsley and red pepper flakes for a green-and-red finish. On game days, add sliced jalapeño and a drizzle of chipotle hot sauce after baking for smoky heat. You can even go breakfast-style with a sprinkle of cooked crumbled turkey sausage before the last bake.
Double the batch and bake two crusts at once on separate racks, rotating halfway. Cool completely, then stack with parchment between layers in a zip-top bag or lidded container. Reheat at 425 F for 6 to 8 minutes, add cheese, and bake until melted. For quick snacks, slice before chilling so you can reheat only what you need. Keep dipping sauces portioned in small jars in the fridge for grab-and-dip convenience. If packing for lunch, wrap in parchment so the crust keeps its pleasant bite instead of steaming in plastic.
These cheesy cauliflower breadsticks bring big comfort without the weight, and they always spark that just-one-more moment at the table. I hope they become your new go-to for cozy nights, easy lunches, and everything in between. Make them once, and you will find a dozen reasons to bake them again.
Rub dried oregano between your fingers to release its oils for deeper flavor.
Compact the edges of the crust so they bake up sturdy and do not crumble.
Cool a few minutes before slicing to let the cheese set for cleaner cuts.
This nourishing cheesy cauliflower breadsticks recipe is sure to be a staple in your kitchen. Enjoy every moist, high protein slice — it is perfect for breakfast or as a wholesome snack any time.
Yes. Use frozen riced cauliflower straight from the freezer. Microwave until hot and steamy, then let it cool and blot any excess moisture before mixing.
Not usually, because microwaving drives off moisture. If the cauliflower looks wet or pools liquid, quickly squeeze in paper towels or a clean towel.
You can try dairy-free mozzarella shreds and add 2 to 3 tablespoons nutritional yeast for flavor. Texture will be slightly softer but still tasty.
This Cheesy Cauliflower Breadsticks recipe makes perfectly juicy, tender, and flavorful steak every time! Serve with potatoes and a side salad for an unforgettable dinner in under 30 minutes.
Preheat oven to 425 F. Line two pizza pans or one large baking sheet with parchment paper.
Chop cauliflower into florets and pulse in a food processor until it resembles rice.
Place riced cauliflower in a microwave-safe container with lid and microwave 10 minutes. Let steam dissipate; blot if it seems wet.
In a large bowl, combine cooked cauliflower, eggs, 2 cups mozzarella, oregano, garlic, salt, and pepper. Mix until evenly combined.
Divide the mixture between prepared pans. Press into two rectangles or rounds about 1/4 inch thick, smoothing the surface and compacting edges.
Bake 25 minutes until golden and set. Top with remaining 1 cup mozzarella and bake 5 minutes more until melted. Cool briefly, slice, and serve.
Last Step: Please leave a rating and comment letting us know how you liked this recipe! This helps our business to thrive and continue providing free, high-quality recipes for you.
Leave a comment & rating below or tag
@velvetyum on social media!

Tender grilled zucchini rolled with a basil-kissed ricotta filling, nestled in marinara, and baked until the mozzarella bubbles and turns golden.

Golden, garlicky rounds with a deep-fried crunch made lighter in the air fryer. A fast, vitamin-packed side everyone devours.

Tender chicken meatballs simmered in marinara, finished with melted mozzarella and basil for cozy, weeknight Italian comfort in every bite.
Leave a comment & rating below or tag @velvetyum on social media!
Enjoyed this recipe? Share it with friends and family, and don't forget to leave a review!
This recipe looks amazing! Can't wait to try it.
Comments are stored locally in your browser. Server comments are displayed alongside your local comments.

Join to receive our email series which contains a round-up of some of our quick and easy family favorite recipes.
