
>>

Crunchy tortilla shells coated in graham crumbs and filled with fluffy cheesecake filling, topped with bright cherry pie filling for a quick, crowd-pleasing dessert.
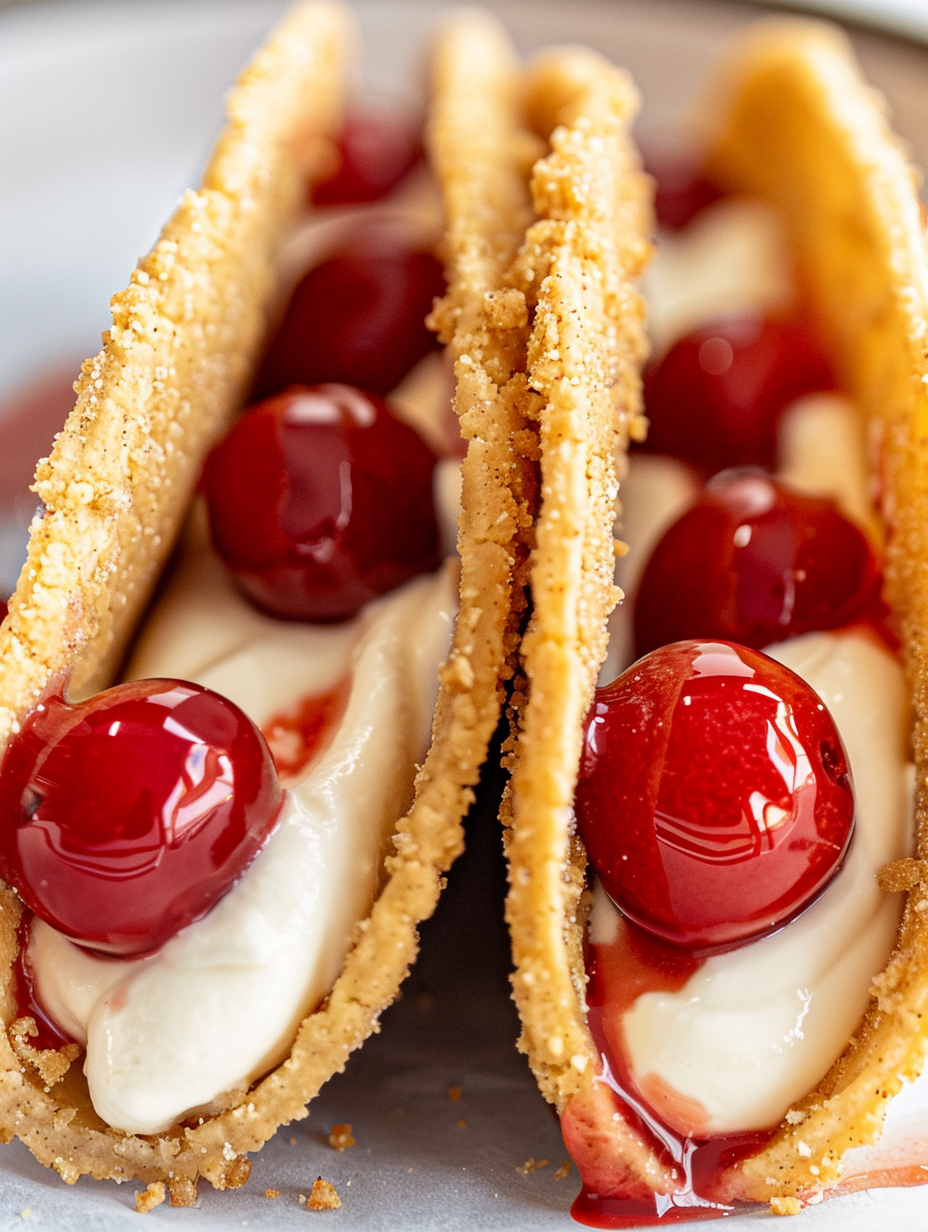
This recipe for cheesecake tacos quickly became my go-to treat for casual gatherings and after-school surprises. I first discovered the idea when I wanted to make something handheld, nostalgic, and sweet without spending hours baking. The result is a contrast of textures that always gets comments: a crisp, golden taco shell that crunches when you bite into it, followed by a cloudlike cream cheese filling and a bright, syrupy cherry topper. It is playful dessert presentation with familiar flavors, and every time I bring a tray to a party they disappear within minutes.
I learned a few small tricks the first time I made these that make all the difference. Using street taco size flour tortillas keeps the shells light and perfectly sized for a single bite. A quick press into graham cracker crumbs gives the outside a sandy, cookie-like texture that echoes classic cheesecake crust. The filling is deliberately simple but depends on properly softened cream cheese and gentle folding so the whipped topping stays airy. When time is short, these come together in under 30 minutes of active time, though chilling the filling briefly helps with piping and presentation.
I remember serving these at a summer potluck; the way the sunlight hit the cherry topping and the bright flavors made everyone smile. My sister asked for the recipe on the spot and now she makes them for every picnic. They are the kind of dessert that invites improvisation and always rewards small adjustments, like swapping the crust crumbs or adding a sprinkle of toasted coconut.
My favorite part about this recipe is the way it turns a familiar cake into a playful handheld. At a summer barbecue my niece declared them the best dessert ever because she could eat chocolate ice cream on a taco and otherwise be very proud of herself. The simplicity encourages experimentation, and I often find myself swapping in seasonal preserves for the cherry to keep things new.
To maintain the crisp texture, store shells and filling separately until right before serving. Keep baked shells in an airtight container at room temperature for up to three days; if you need to store longer, place them in a freezer bag and freeze for up to three months. Thaw shells at room temperature and re-crisp in a 325 degrees F oven for three to five minutes if needed. Store the assembled items in a single layer in the refrigerator and consume within 24 to 48 hours. For best appearance keep sauces and wet toppings separate and add them immediately prior to serving to avoid sogginess.
If you prefer a gluten free version swap the flour tortillas for certified gluten free tortillas and use gluten free graham crumbs or finely ground gluten free cookies. To lighten the filling replace half of the cream cheese with mascarpone or a thick Greek yogurt, though expect slightly less structure. For dairy free options use a dairy free cream cheese and dairy free whipped topping; the texture will be close but slightly less rich. Swap cherry pie filling for any smooth fruit pie filling or preserves; thin preserves with a teaspoon of warm water if they are too stiff to spoon or pipe.
Serve these on a flat platter with mint sprigs and a dusting of powdered sugar for a picnic or alongside coffee after dinner. For an evening dessert tray offer a few topping bowls such as chocolate sauce, caramel, or toasted almonds so guests can customize. For a brunch twist pair with fresh berries, lemon curd, and a light whipped cream for a tangy variation. Use a compact stand to display them upright or nestle them in shredded paper for a festive presentation at parties.
This playful mash up borrows the handheld charm of tacos and the creamy profile of classic American cheesecake. While not a traditional dish in any one cuisine it reflects contemporary kitchen creativity where format and flavor meet. Using tortillas as a vessel for desserts traces back to innovations that reimagine savory carriers in sweet contexts. The graham coating nods to the graham cracker crust that is integral to many American desserts and gives a familiar flavor bridge between the two concepts.
In summer swap cherries for macerated strawberries or peach preserves for a lighter, fruit forward version. In fall use apple pie filling and a pinch of cinnamon in the cream for warming spice notes. For winter holidays consider cranberry-orange compote and a splash of orange zest in the filling, or top with toasted pecans for texture and toasts the seasonal palate.
Prepare the filling up to a day in advance and keep it chilled in an airtight container. Bake the shells earlier in the day and store at room temperature in a sealed container. When ready to serve, pipe filling and top with fruit in about ten minutes. This makes it easy to produce multiple trays quickly for larger gatherings without last minute fuss. Use a disposable piping bag for easy cleanup when serving many guests.
These cheesecake tacos combine convenience with charm and always spark conversation. Whether you bring them to a potluck or make them for a quiet dessert at home, they invite playful presentation and flavor variations that make the recipe yours. Enjoy the crunchy shell, creamy filling, and bright cherries, and feel free to adapt toppings to make them a signature treat.
Make sure the cream cheese is at room temperature so it whips into a silky filling without lumps.
Chill the filling for at least 30 minutes before piping; this firms it and makes assembly neater.
Coat tortillas with melted butter and press into the graham mixture while still warm for better adhesion and crunch.
If you cannot find street taco size tortillas cut larger tortillas with a 4 inch round cutter.
Store shells separately from filling and toppings to preserve texture; assemble just before serving.
This nourishing cheesecake tacos recipe is sure to be a staple in your kitchen. Enjoy every moist, high protein slice — it is perfect for breakfast or as a wholesome snack any time.
Yes, you can make the shells ahead of time and store them in an airtight container at room temperature for up to three days. Re-crisp in a 325 degrees F oven for a few minutes if needed.
Assemble just before serving for best texture. If you must assemble earlier, keep them chilled and consume within 24 hours to avoid soggy shells.
This Cheesecake Tacos recipe makes perfectly juicy, tender, and flavorful steak every time! Serve with potatoes and a side salad for an unforgettable dinner in under 30 minutes.
Preheat oven to 400 degrees F. In a shallow bowl combine graham cracker crumbs and granulated sugar and set near your workspace for coating the tortillas.
Stab each tortilla about six to seven times with a fork to prevent air pockets. Brush both sides with melted butter so crumbs adhere and shells brown evenly.
Press the buttered tortillas into the graham mixture to coat both sides. Fold tortillas in half and tuck between the cups of an upside down cupcake pan to hold the taco shape during baking.
Bake shaped tortillas for about ten to eleven minutes until golden brown and crisp. Allow shells to cool completely in the pan to set their shape.
Beat softened cream cheese, powdered sugar and vanilla until smooth. Fold in thawed whipped topping until light and fluffy. Chill for at least thirty minutes to firm.
Transfer filling to a piping bag and pipe into cooled shells. Top each with three to four cherries and spoon some sauce over each taco. Serve immediately for best texture.
Last Step: Please leave a rating and comment letting us know how you liked this recipe! This helps our business to thrive and continue providing free, high-quality recipes for you.
Leave a comment & rating below or tag
@velvetyum on social media!

Tender grilled zucchini rolled with a basil-kissed ricotta filling, nestled in marinara, and baked until the mozzarella bubbles and turns golden.

Golden, garlicky rounds with a deep-fried crunch made lighter in the air fryer. A fast, vitamin-packed side everyone devours.

Tender chicken meatballs simmered in marinara, finished with melted mozzarella and basil for cozy, weeknight Italian comfort in every bite.
Leave a comment & rating below or tag @velvetyum on social media!
Enjoyed this recipe? Share it with friends and family, and don't forget to leave a review!
This recipe looks amazing! Can't wait to try it.
Comments are stored locally in your browser. Server comments are displayed alongside your local comments.

Join to receive our email series which contains a round-up of some of our quick and easy family favorite recipes.
